Chat with us, powered by LiveChat

Quickrides Knowledge Base Get Support 24/7

User

The User Management feature empowers administrators to efficiently oversee customer information and interactions within the QuickRides platform.

From the Admin Dashboard, click on ‘User’ located in the ‘General’ section of the sidebar menu.
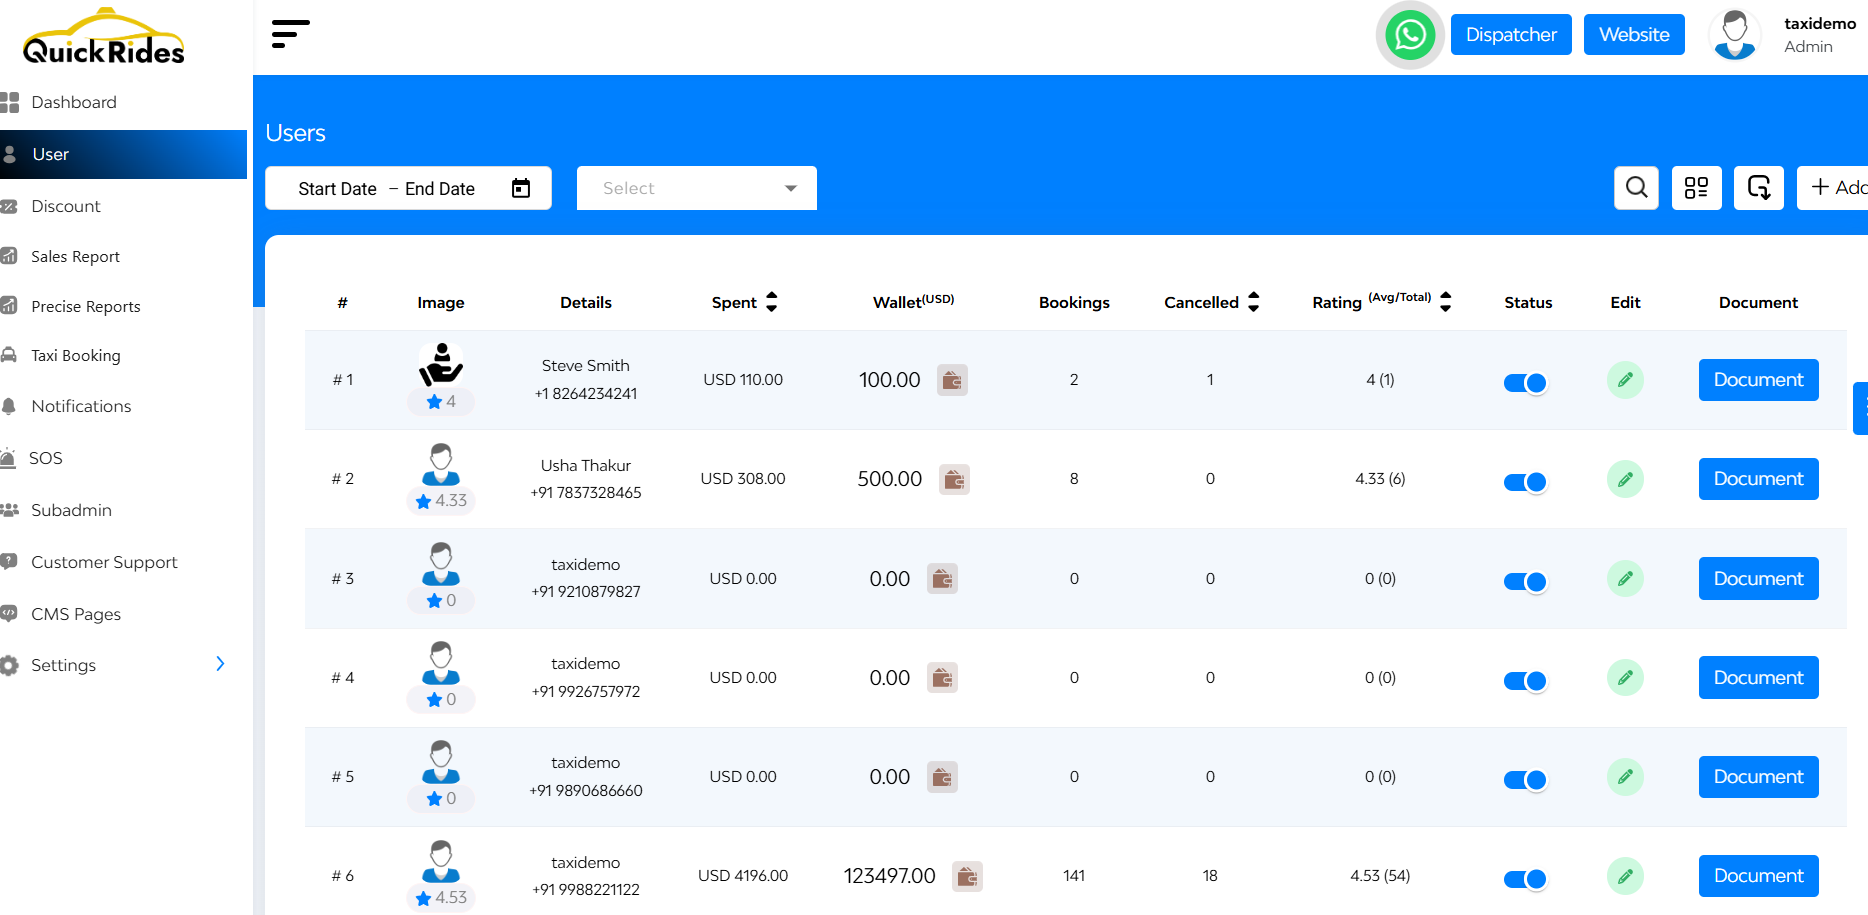
Upon accessing the ‘user’ section, administrators can view a comprehensive list of registered users with the following details:

  • Image
  • Details (name, phone number)
  • Total Reservations Made
  • Total Amount Spent
  • Ratings
  • Status
  • Edit
  • Document
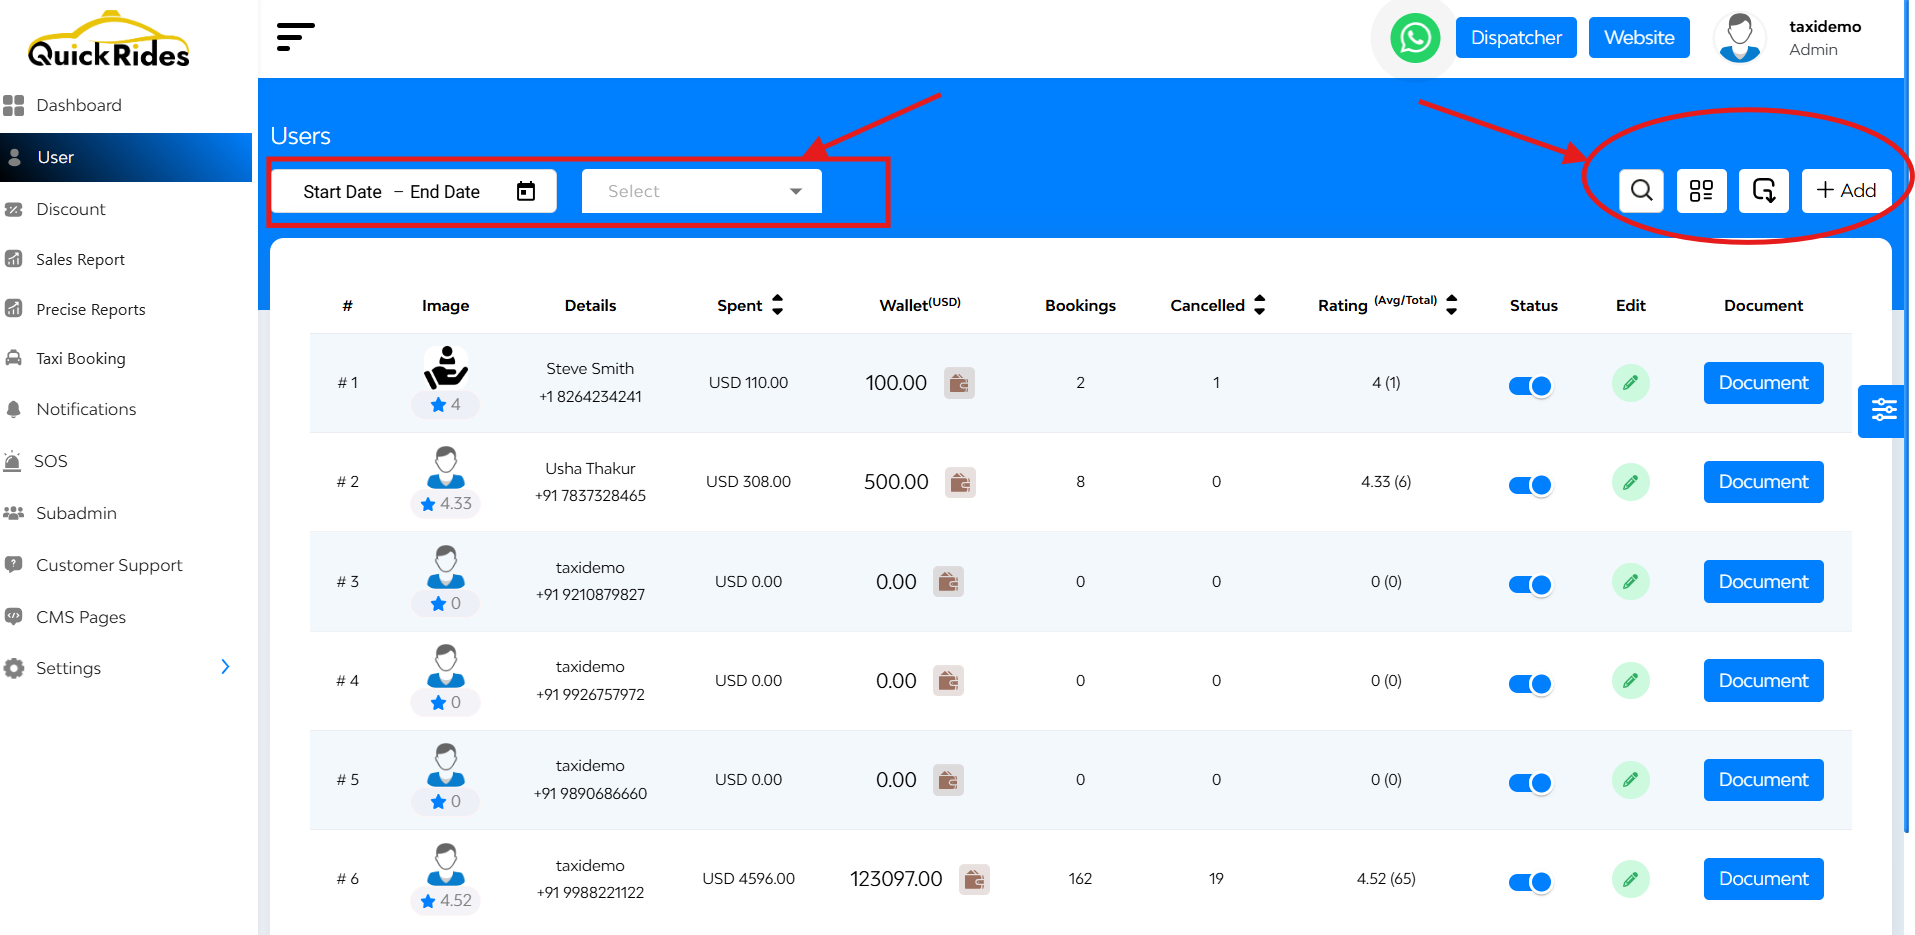
  • At the left corner there’s a tabs regarding date range picker or a tab for date filter like (“today,” “yesterday,” “last 7 days,” and “this month”)
  • At the right corner 4 tabs are there
  1. Searchbar (name/phone/email)
  2. Change view mode (table/card)
  3. Export button
  4. Add new user

+ Adding New Users

Administrators have the capability to manually add new users:

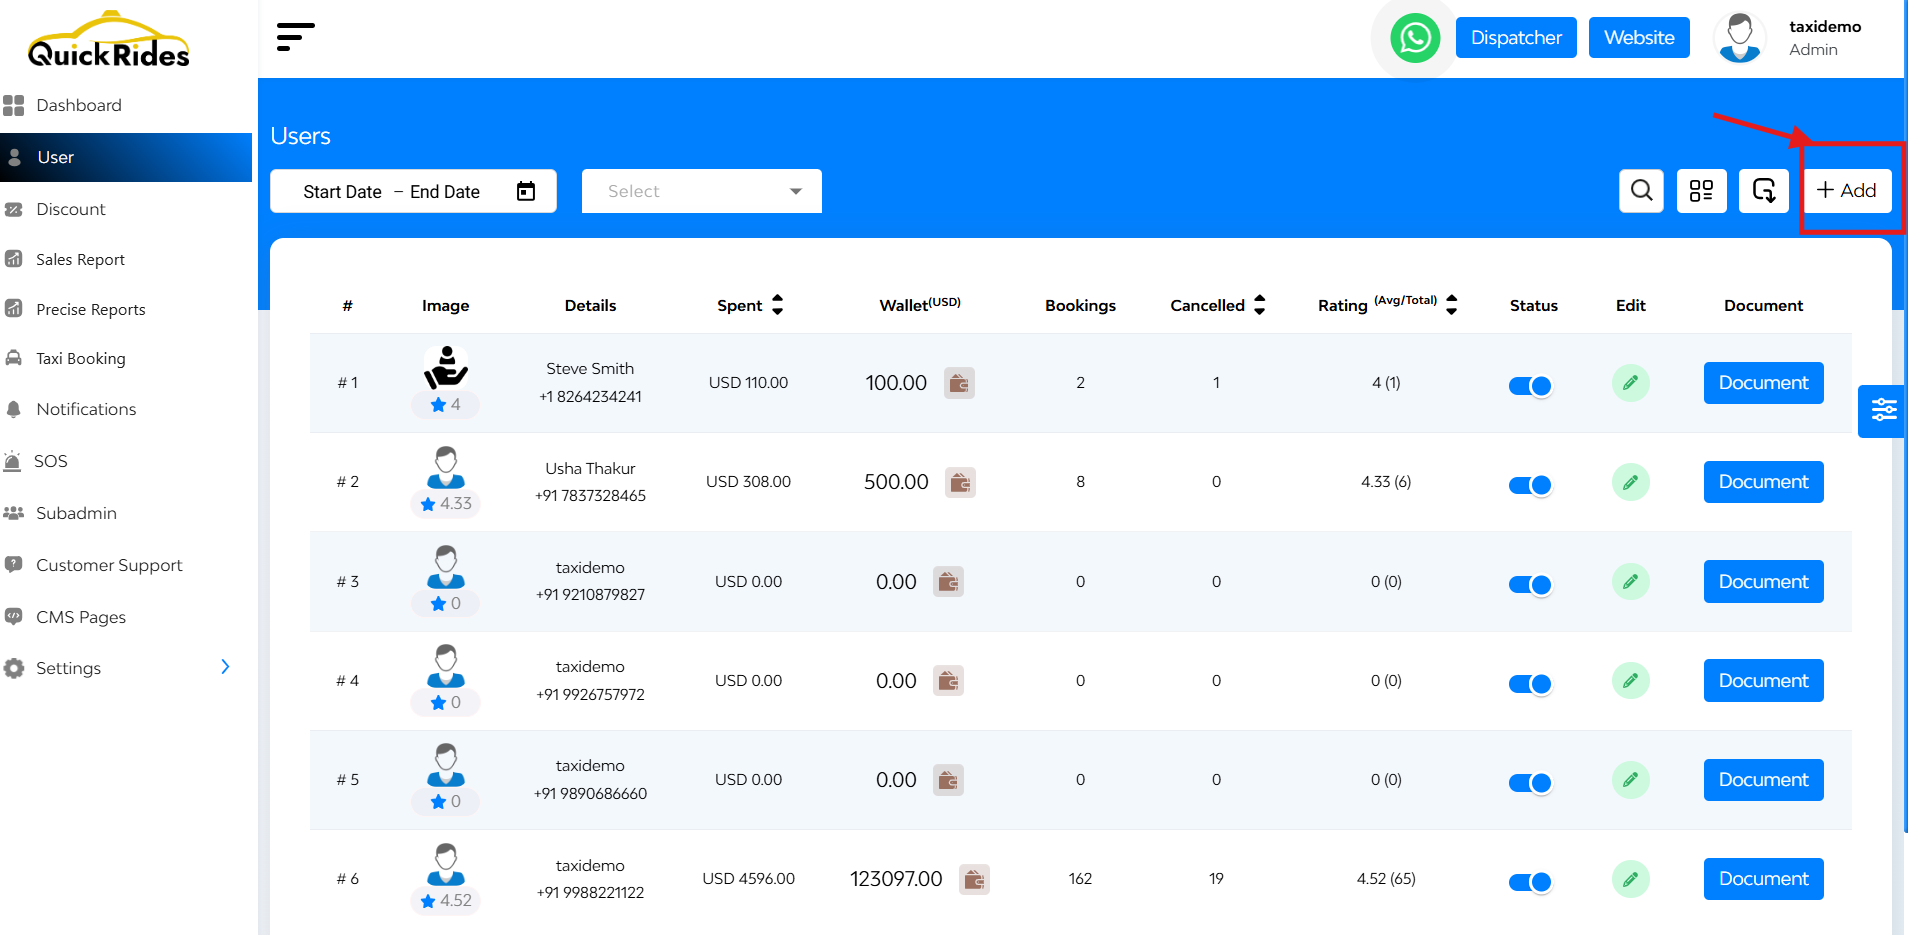
  1. Initiate Addition: Click on the option to add a new user.
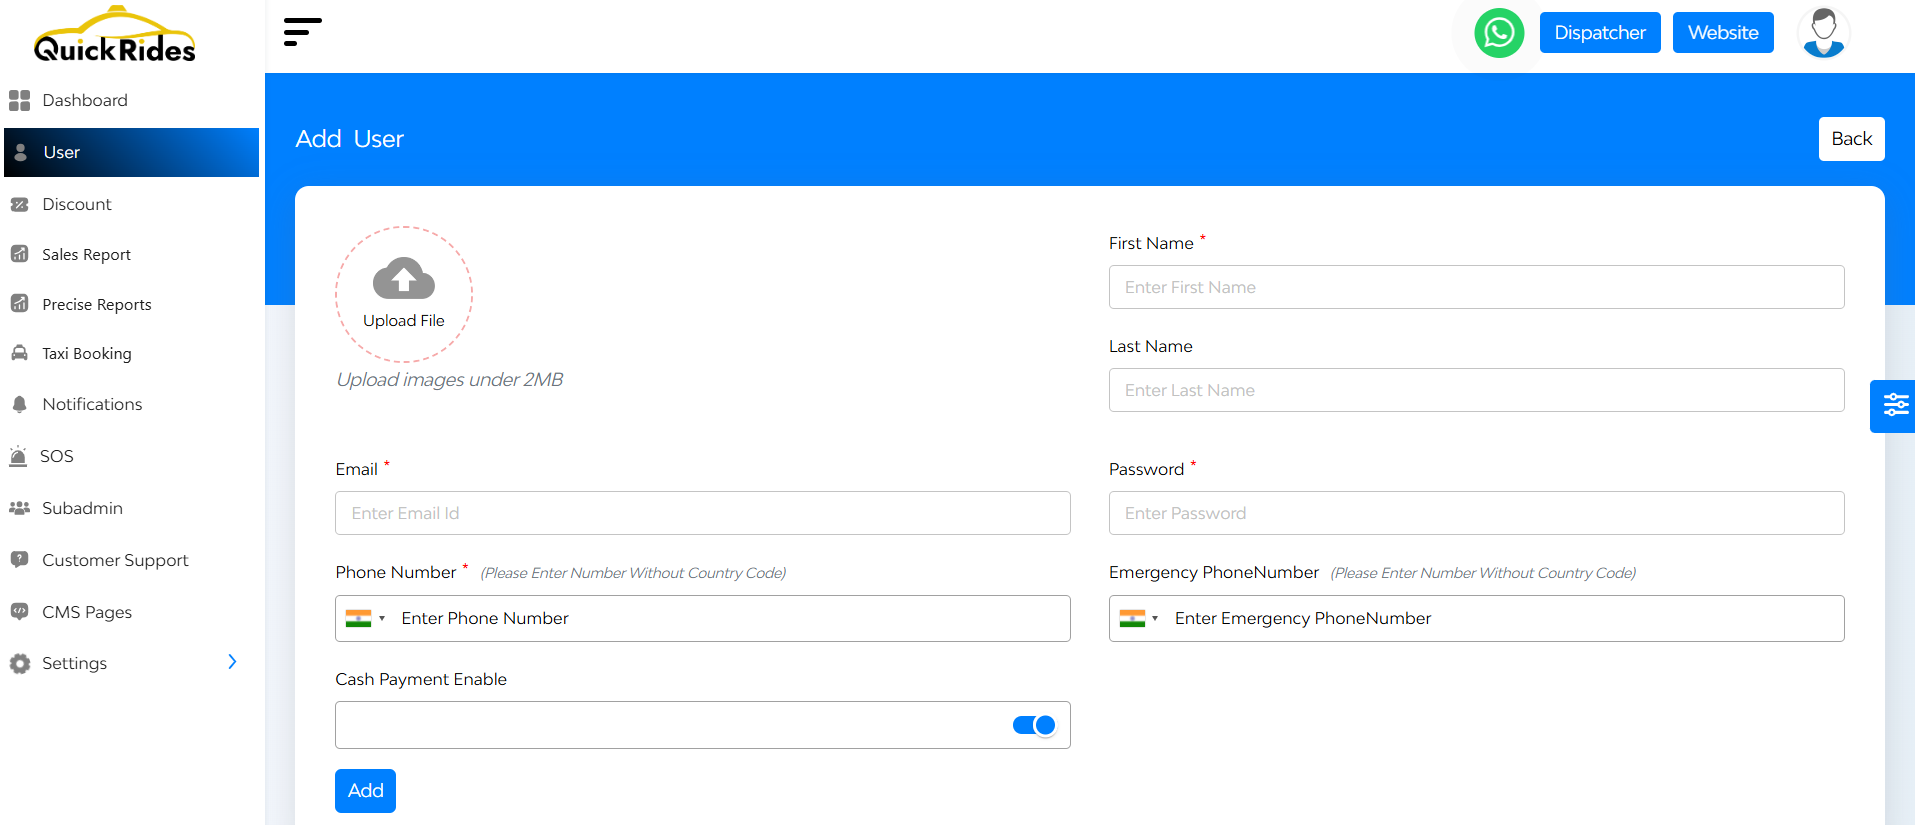
  2. Enter Details: Provide necessary information such as name, contact details, and other relevant data.
  3. Add: Confirm and save the new user profile.

FAQ's

The User Section allows platform administrators to manage all users who have signed up. It offers tools to view, edit, block, and monitor user activity, ratings, and wallet balances.

Each row in the list view shows:

  • User’s name and profile image
  • Phone number
  • Average rating
  • Total amount spent
  • Wallet balance

Yes. Admins can credit or debit money from a user’s wallet directly from the dashboard. Each transaction is recorded and visible, including the admin’s name and the action taken.

Absolutely. You can view:

  • Total number of bookings made
  • Number of bookings cancelled by the user
  • Average rating received from drivers
  • Number of drivers who contributed to the user’s rating

You can view the current status of a user (active or blocked) and choose to block them for an indefinite period.

Blocked users will no longer have access to the platform until reactivated.

Yes. By clicking on the Edit button, you can update:

  • First name and last name
  • Email address
  • Password:

All changes reflect in real-time in the user list.

If document verification is enabled:

  • You can view or edit uploaded documents
  • You can upload new files by submitting the front and back of the required identity document

This is typically used for verifying driver’s licenses, ID cards, etc.

You can filter the user list by:

  • A custom date range
  • Predefined durations like Yesterday, Last 7 Days, or Last 30 Days

These filters help you track new user registrations within a specific timeframe.

Yes. Use the search bar to find users using their phone number or email ID.

Yes. You can switch from a list view to a card view, where each user is displayed as an individual card with quick access to actions like editing or blocking.

You can:

  • Export the current user list to your local storage for offline reference or reporting
  • Import user data using a properly formatted Excel or CSV file

Before importing, always download the sample sheet to ensure your file matches the required structure.

Yes. Use the Add User option to enter:

  • First name, last name
  • Email address
  • Phone number
  • Emergency contact number

All required fields are marked with an asterisk (*).

Yes. While adding or editing a user, you can choose to enable or disable cash as a payment mode for that individual user.

Double-check your date range or filters.

If no users match the filter criteria, the list will appear empty.

You can click on “Clear Filters” to reset and reload the full list.

Typically, only users with admin-level permissions or specific access rights can manage this section. Access can be restricted based on your platform’s role-based access control settings.