Chat with us, powered by LiveChat

Quickorders Knowledge Base Get Support 24/7

How to Create an Order in Quickorders?

Today as we know on demand, businesses are leveraging the power of order management software. Creating orders for your app is crucial if you’re starting a business. With Quickorders, creating orders is a simple procedure. Users can put in orders by inputting the order description, and these orders can contain any number of products. Custom orders can be advantageous for your business if you run a grocery shop or food delivery service because they give your audience more freedom of choice, which can help you keep clients.

Quickorders is an order management software that helps you to streamline orders for your on demand business.
Let’s explore how to create an order in Quickorders

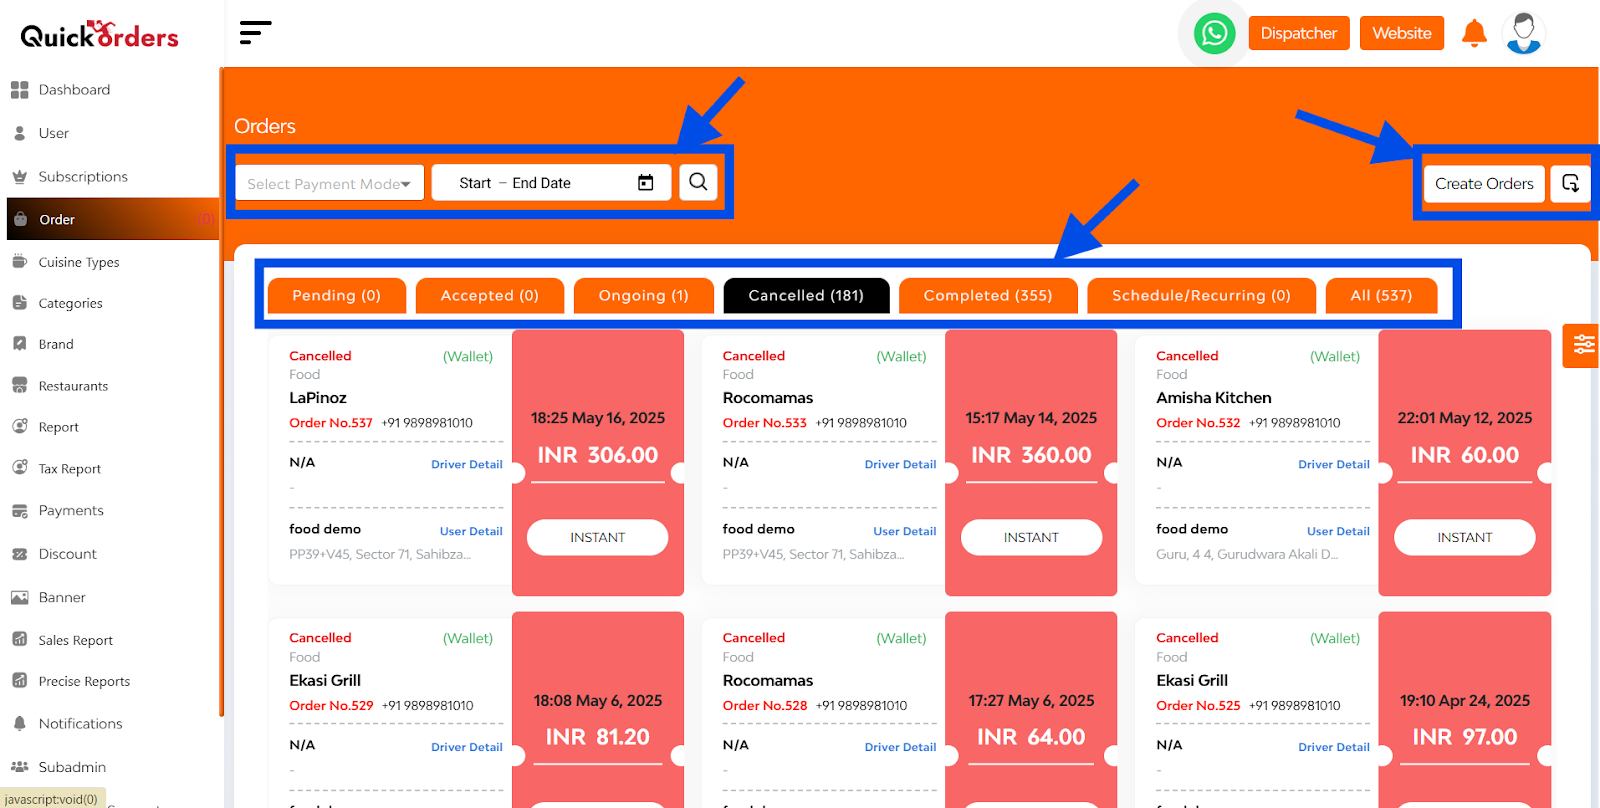
  • Go to the order feature in admin panel, click on create orders.
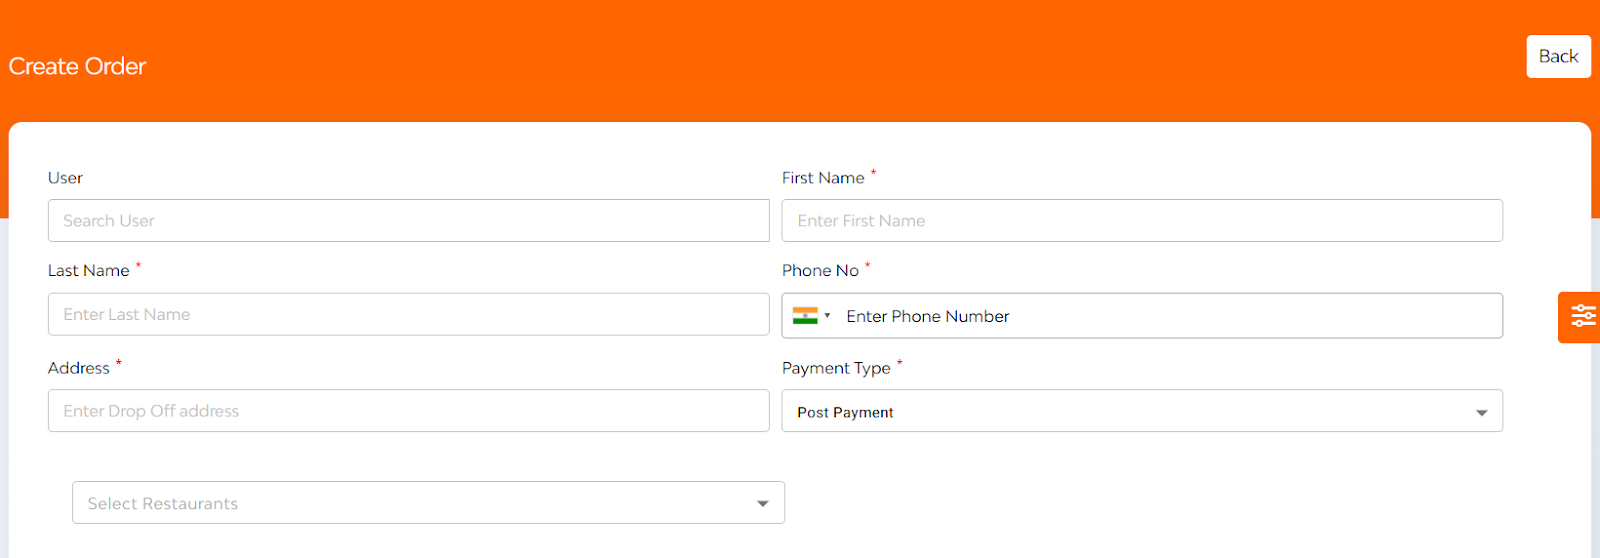
  • Enter the details of the order such as first name, last name, phone number and address.
  • Select the payment type you want here.
  • UPIs
  • Whereas post payment refers to cash on delivery
  • Whereas most payment refers to cash on delivery.
  • Click on the food option, select the restaurant.
  • You want to create an order from select the outlet option and you will see the various cuisines.
  • The restaurant has to offer, select your desired food item and click submit.
  • Admin can also give a discount.
  • The discount value can be in percentage or flat currency.
  • Click on Create to finish creating an order to know more about quick orders.

In the order feature, you can also see various filters such as payment mode dates, user name, order id in store name. All these filters can help you locate a particular order. Keeping track of your orders can be a useful tool for streamlining and managing your clientele. You can acquire the complete product details by exporting order details from the Dashboard to your email.

How to Label Orders?

Suppose a new order is created. It first comes in the pending section here. You can see the various details like merchant and customer details alongside date time and build amount of the order. When an order is placed, the admin or merchant has the choice to accept or reject it. The charges are automatically taken if it is disabled.

  • The green color indicates the order is completed.
  • The yellow color indicates an order that is in making.
  • The red color indicates a canceled order.

Order accepted

Order accepted

You can optionally provide a deadline when you enable the Accept/Reject Order functionality, after which the Order will be automatically canceled. The Customers don’t have to wait long if the Merchant rejects it within the allotted period. You may uphold your standards and rules as an Admin. This Order Acceptance Time can only be adjusted by the Admin, and it may vary depending on the Merchant.

If the order is accepted, then it moves to the accepted order tab.

Order canceled
Order canceled

According to the status of the order, the Orders page is divided into four sections: Pending, Dispatched/In progress, Completed, and Cancelled. The admin or merchant can concentrate on one sort of Order at a time by using the orders page.

If the order is canceled, it moves to the canceled tab in the accepted tab.

Order delivered/Ongoing

Let’s say if a customer wants to create an order for a particular date and time it shows up in the scheduled tab, all orders which are not scheduled are considered as instant delivery orders in the all tab you can see all the orders here.
Different colors represent different statuses of the orders. If the order is delivered by the driver, the admin can change its status to order delivered. If the order is currently in making, it shows up in the ongoing tab.

How to Export Data?
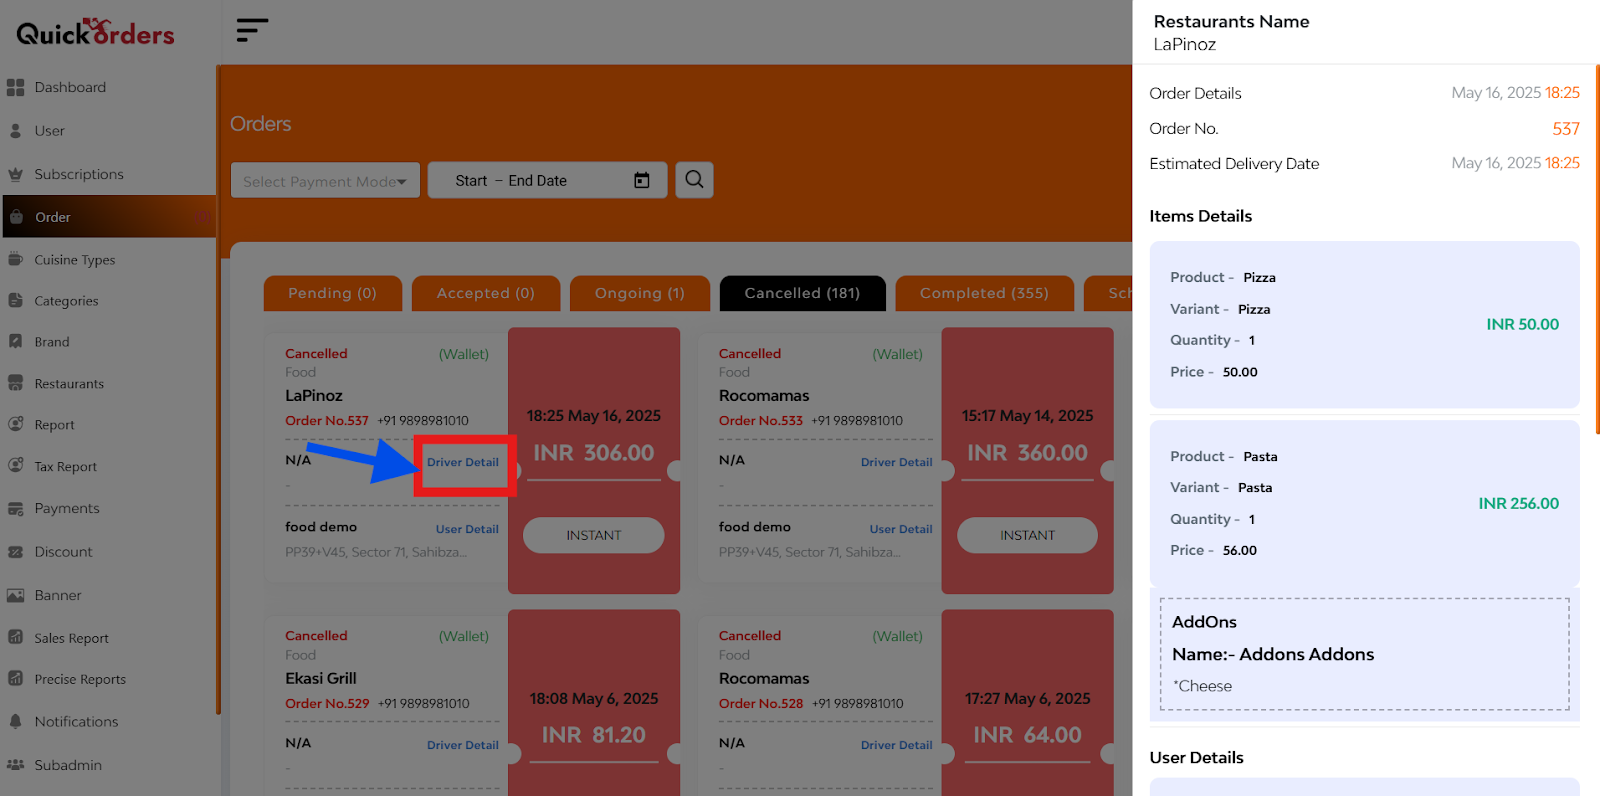
Click on ‘Export Orders,’ if you wish to export the data with product details and enter the email address.
Click on ‘Submit’.
You will receive the order details with a template in your email.

View Demo

How To Create an Order

How To Create an Order