Chat with us, powered by LiveChat

Quickorders Knowledge Base Get Support 24/7

User

The User Management feature empowers administrators to efficiently oversee customer information and interactions within the platform.

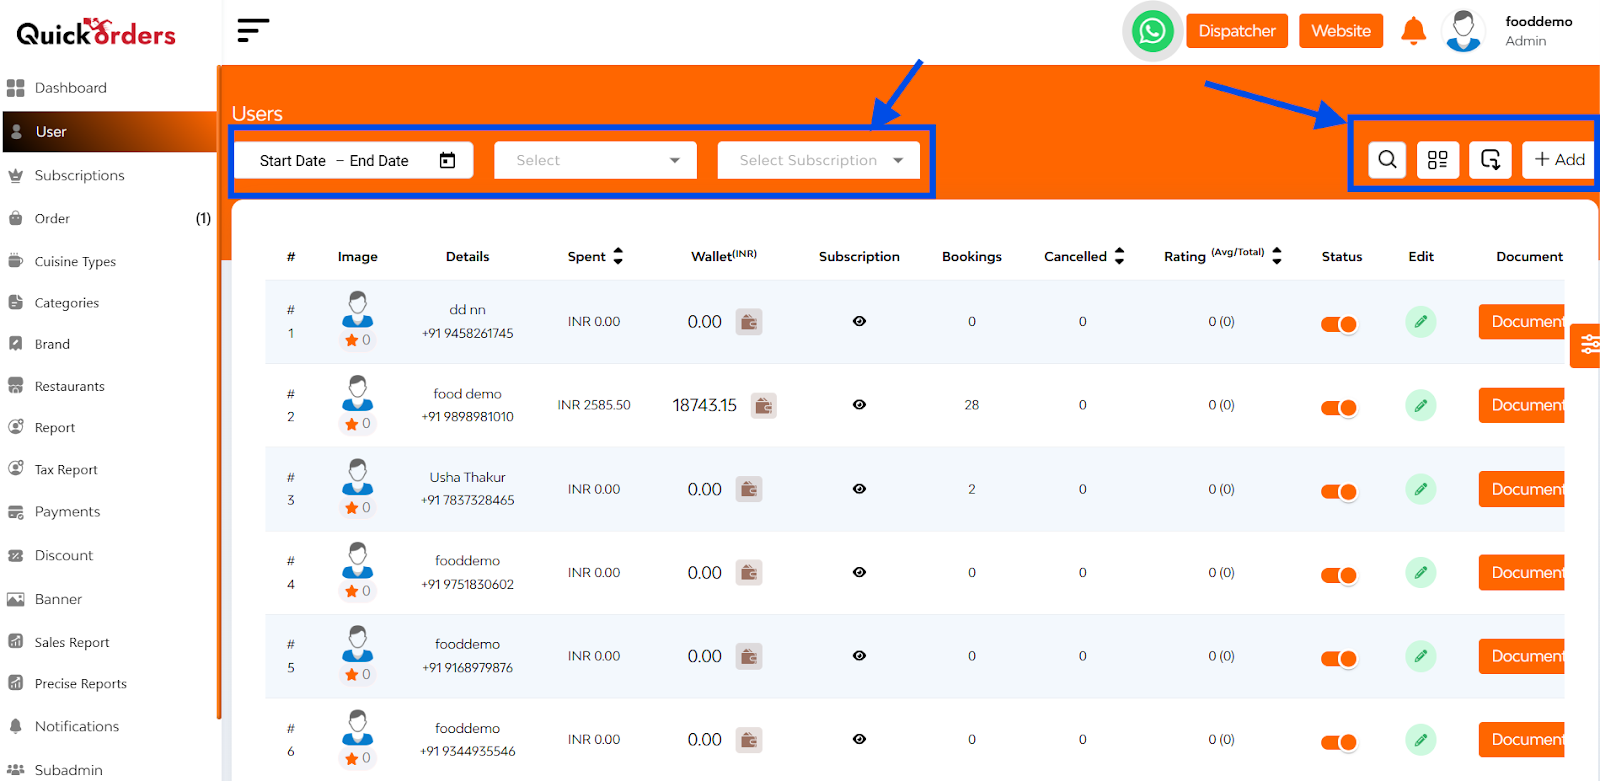
Upon accessing the ‘user’ section, administrators can view a comprehensive list of registered users with the following details:

  • Image
  • Details (name, phone number)
  • Total Amount Spent
  • Wallet
  • Subscription
  • bookings
  • cancelled
  • Ratings
  • Status
  • Edit
  • Document

At the left corner there’s a tabs regarding date range picker or a tab for date filter like (“today,” “yesterday,” “last 7 days,” and “this month”)

At the right corner 4 tabs are there:

  1. Searchbar (name/phone/email)
  2. Change view mode (table/card)
  3. Export button
  4. Add new user

+ Adding New Users

Administrators have the capability to manually add new users:

  1. Initiate Addition: Click on the option to add a new user.

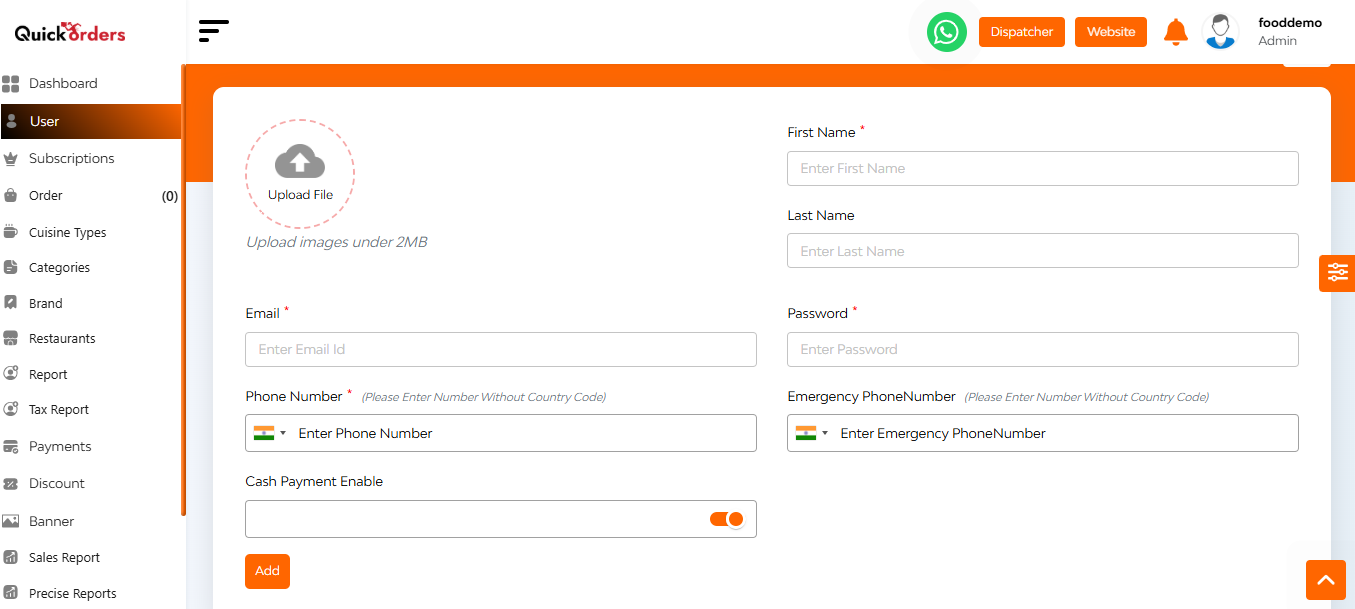
2. Enter Details: Provide necessary information such as name, contact details, and other relevant data.
3. Add: Confirm and save the new user profile.

FAQ's

The User Management section provides a centralized dashboard to view, search, manage, and update all user-related information. It enables admins to perform actions like editing user details, managing subscriptions, adjusting wallet balances, and handling document verification.

Yes, you can filter users by selecting a custom date range (e.g., 1st May to 23rd May) or use quick filters like “Last 7 Days”, “Last 30 Days” from the dropdown. To remove filters, simply click the Clear button.

You can search users by their name, email address, or phone number using the search bar provided at the top of the user list.

Yes, you can toggle between list view and grid view to see user details in your preferred format.

Absolutely. You can export the entire user list to your local system by clicking the Export button. The file will be downloaded in a standard format (e.g., CSV or Excel).

Click on the Add User button, then enter the user’s name, email, phone number, password, and other required details. You can also enable or disable cash payment options at the time of user creation.

Each user has a digital wallet. Admins can credit or debit amounts to it manually. This is useful for refunds, rewards, or corrections. Every transaction is recorded and visible in the Transaction History tab for transparency.

Yes, you can view a user’s subscription history, including the subscription name, start date, end date, and current status.

You can see the total number of bookings made, how many were cancelled, and any ratings given by the user. This provides insights into user activity and behavior.

There’s a toggle switch available for each user. Simply switch it off to deactivate (block) the user, and switch it on to reactivate the account.

Yes, click the Edit button beside the user to update details such as first name, last name, password, or emergency password. Once done, click Update to save the changes.

All documents submitted during user onboarding are accessible in the Documents tab. You can view, accept, or reject them after verification.

If a user is unable to log in or access the platform, you can create a new user profile for them manually via the Add User button and share the credentials directly.

Yes. During or after user creation, you can enable or disable cash payments for that user. This affects their ability to select cash as a payment method during orders.

Yes, all changes—such as wallet updates, subscription status, or blocking a user—are reflected in real time on the panel.