
Restaurant Panel Get Support 24/7
Helpdesk Quickorders Knowledge Base Restaurant Panel Manage Products
Manage Products
The Manage Products section keeps your product catalog under control and well-organized. It’s divided into three key parts:
1. Add New Products
The default view displays all your products as individual cards. Each card includes:
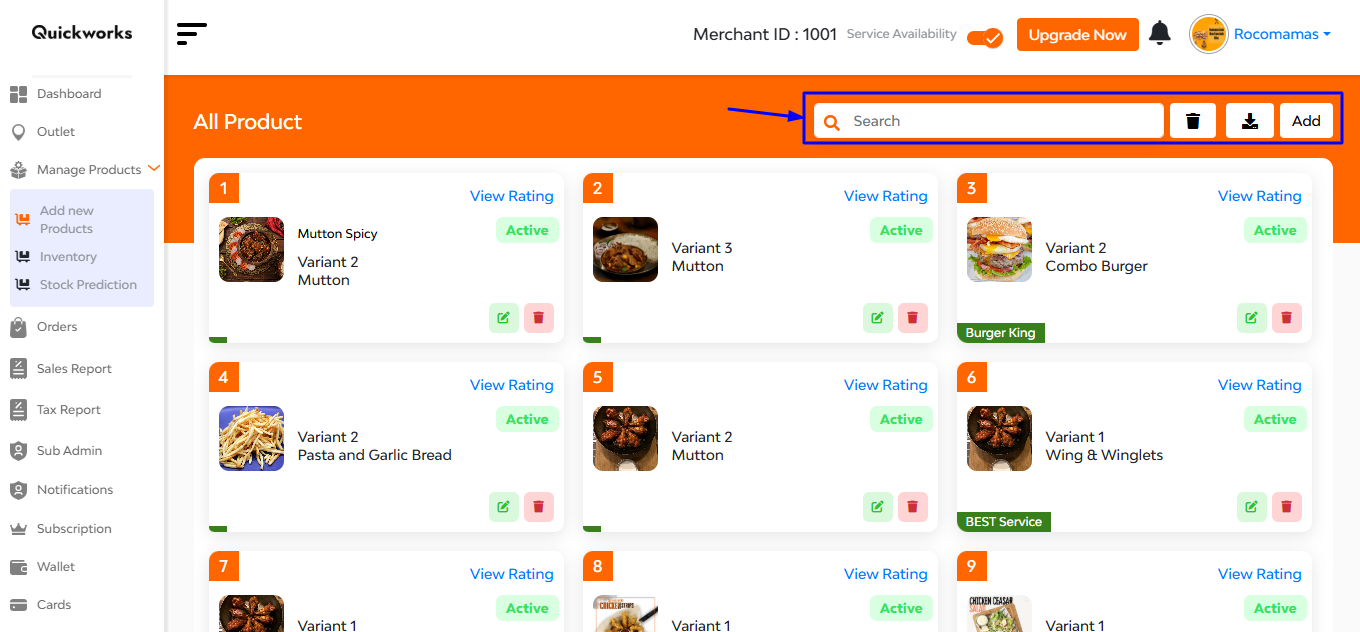
- Product image and name
- Variants
- Status (Active/Inactive)
- Quick actions to Edit, Delete, and View Ratings
In this interface at the top right corner you can see 4 functional buttons: 1st is a searchbar, 2nd delete button , 3rd export/import product button and 4th ‘Add’ button.
When you hit the “Add” button, a new page opens where you can enter all the necessary details to list a product. The fields include:
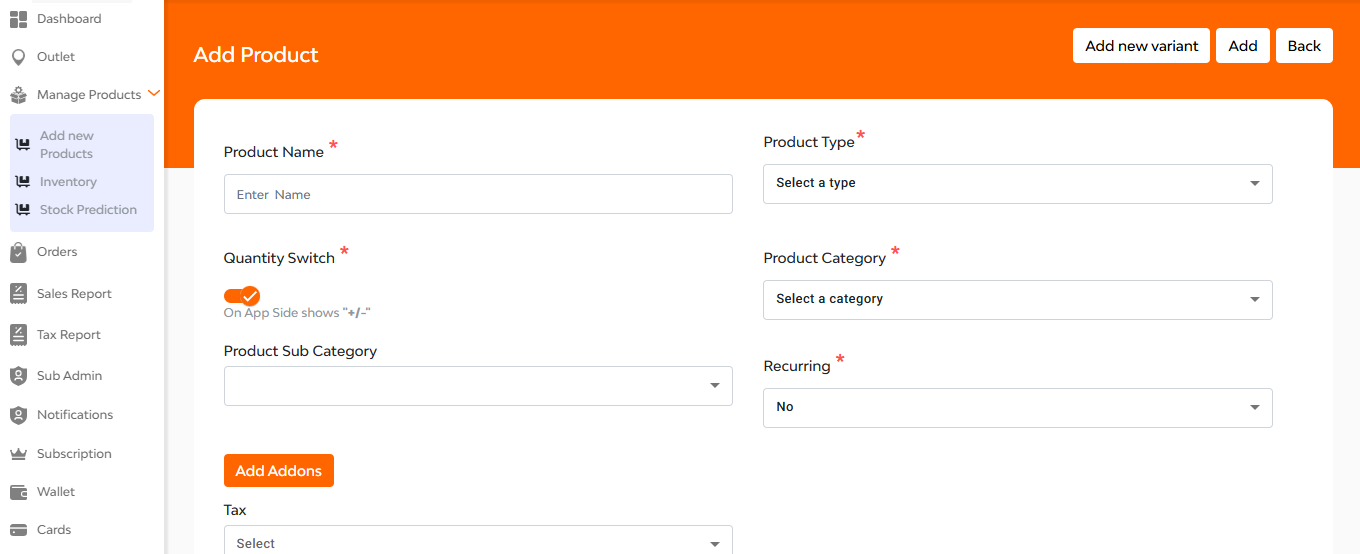
- Product Name
- Product Type and Category/Sub-category
- Quantity Switch toggle (lets users add/remove quantity via app UI)
- Recurring option
Scrolling further down you will find:
A description box to describe the merchant
An Addons dropdown to choose extras like toppings or cheese
Three input fields to set:
- Unit (e.g., kg, piece)
- Unit Value (e.g., 1, 500)
- Selling Price
An option to choose the product as Veg/Non-Veg and upload the images.
2. Inventory
This section helps you monitor product stock levels in real-time. It gives insights into availability, helping you manage supply efficiently and avoid shortages.
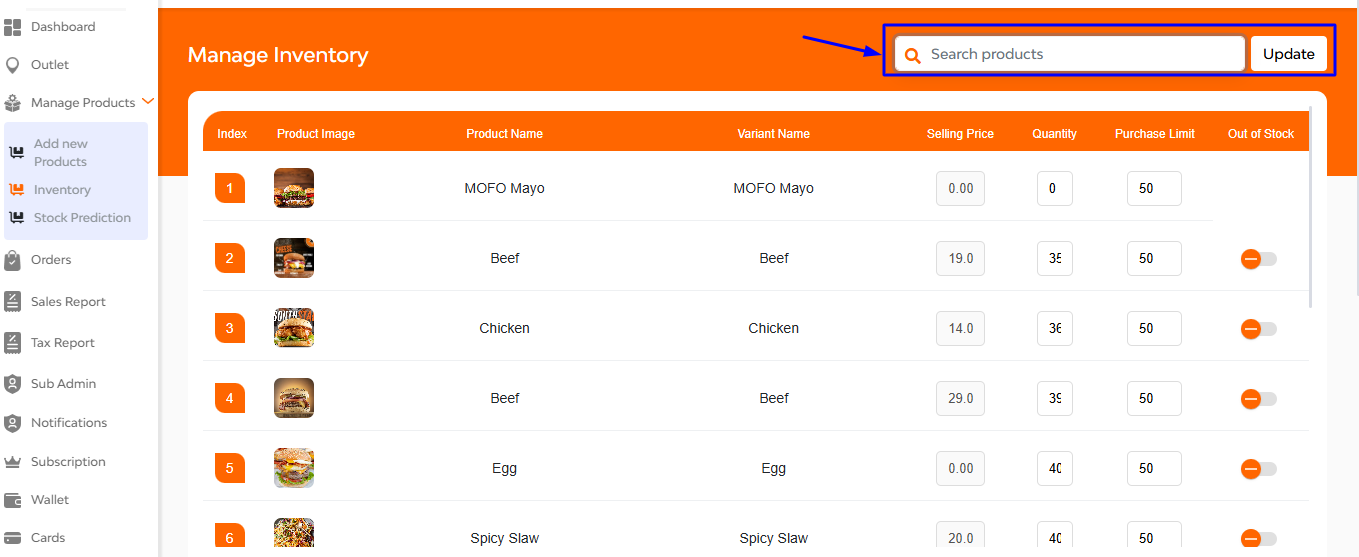
At the top right corner of the interface you can see a ‘search bar’ where you can search the products by simply putting its name. After that is an update button.
Below that you have a clear clear overview of products availability as shown with product image, name, variant name, selling price, quantity, purchase limit, out of stock (with toggle to show yes or no).
3. Stock Prediction
Leverage this smart feature to forecast inventory needs. It uses past trends and sales data to help you plan ahead, restock wisely, and reduce wastage.
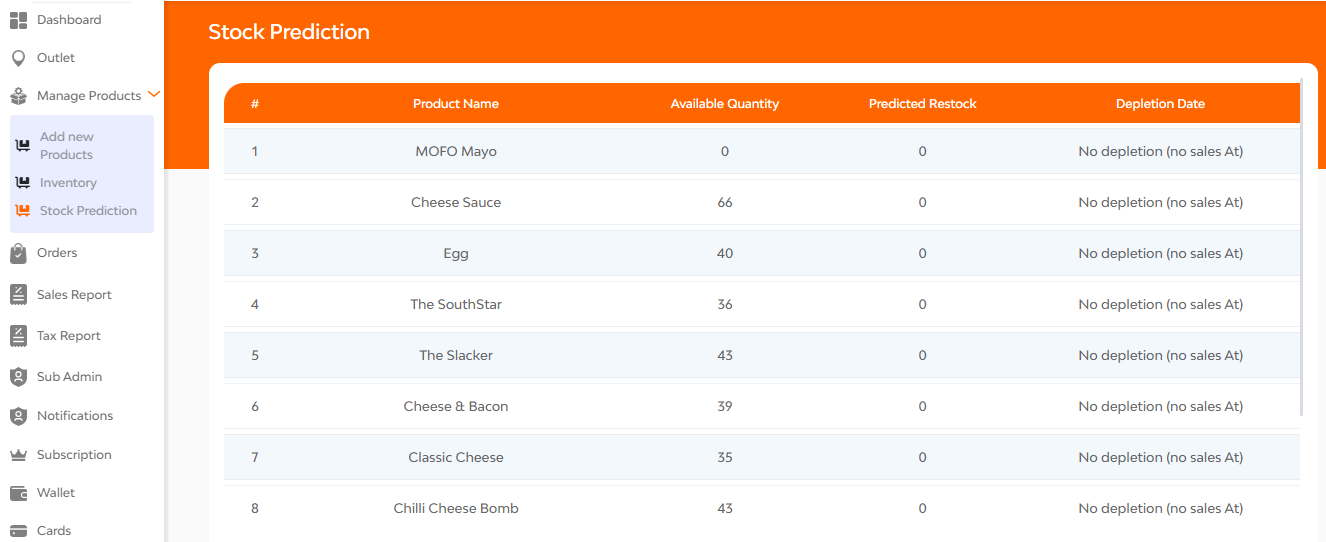
Here in this interface you can see: product name, available quantity, predicted restock and depletion date.
FAQ's
You can manage all your products from the Product Management section of your merchant dashboard. From here, you can view, edit, delete, add, and organize all your listed items.
Click on the “Add Product” button in the Product Management section. Fill in details such as:
Product name
Type (e.g., Sides, Extras)
Category and subcategory
Quantity toggle (on/off)
Add-ons (if applicable)
Description, price, taxes
Unit, veg/non-veg status
Upload images
Click “Add” to save the product.
The Quantity Switch controls whether users can buy multiple quantities of a product.
Enabled: Users can select how many units to buy
Disabled: Only a single quantity can be purchased
Add-ons are optional extras like sauces, toppings, or sides. You can:
- Create add-ons for individual products
- Set min/max purchase limits for each
- Add them during product creation or editing
During product setup, select from the available list of taxes (CGST, SGST, etc.). You can also skip this if the product is tax-free.
Yes, you can upload multiple images for each product. These can be added from your local system when creating or editing a product.
Click on the “Edit” icon on any product card. You’ll be able to update:
- Product name, type, or description
- Add-ons, taxes, images
- Enable/disable the product
- Change pricing or variants
Use the search bar at the top of the Product Management screen. Just type the product name to filter the results instantly.
Yes. You can:
Delete one product using the delete icon
Use bulk delete to remove multiple or all products at once
Yes, merchants can:
Export their current product list to a local file
Import products in bulk using an Excel sheet (template provided in the panel)
Make sure to follow the required format while uploading.
Variants (like sizes or flavors) can be added under each product in the variant section. You can define:
- Variant name
- Prices for each variant
- Add-ons specific to that variant (if needed)
- Product Type: Broad classification (e.g., Main Course, Extras)
- Category: More specific grouping (e.g., Fries, Pizza)
- Subcategory: Optional, used for finer organization (e.g., Cheesy Fries, Classic Fries)
Yes. If no changes are made, you can click “Back” to discard. If you’ve edited something, click “Update” to apply the changes.
Yes. When adding or editing a product, there’s a toggle to mark whether a product is veg or non-veg. This ensures accurate filtering on the customer side.
The product gets added to your menu and becomes visible to customers (if marked active). You can manage it anytime under the same product panel.
The Manage Inventory section allows merchants to track, update, and manage the stock levels of all products they have listed. It helps in optimizing product availability and ensuring customers only see in-stock items.
No, the selling price shown in the inventory list is non-editable. It is fetched from the Product section. If you want to change the selling price, you must go to the Products > Edit Product section and update it there.
You can update the Quantity field for each product directly in the Manage Inventory table. Simply enter the new stock quantity and click Update to save the changes.
Purchase Limit defines the maximum number of units a customer can purchase for a particular product in a single order. It helps manage demand and stock availability.
When you turn on the Out of Stock toggle, the product will still be visible on the customer side, but users will not be able to add it to their cart. It will be marked clearly as “Out of Stock”.
To bring a product back in stock, simply enter a quantity value in the Quantity field (e.g., 10), and click Update. This will automatically remove the “Out of Stock” status and make it available for customer orders.
Yes. Use the Search bar at the top of the inventory list. You can search by product name to instantly filter and locate a specific item.
Yes. Once a product is added through the Add Product flow, it will appear in the Manage Inventory list. From there, you can define stock quantity, purchase limits, and manage its availability.
The Stock Prediction section provides data-driven insights about current inventory levels, depletion rates, and expected restock requirements. It helps merchants make informed restocking decisions based on usage patterns and demand.
Stock predictions are calculated automatically by the system using:
- Available stock (from the inventory)
- Product consumption rate (based on orders)
- User demand trends
- Historical data
The system uses this information to project when stock will run out and when it should be replenished.
This value indicates how much quantity of a product should be restocked, based on how fast it is depleting. It helps you plan your purchases in advance and avoid stockouts.
Depletion Rate refers to how quickly a product is being used or sold. A high depletion rate means the product is in demand and stock is reducing faster.
The Depletion Date is the estimated date on which the stock of a particular product is expected to be fully consumed, based on current consumption trends.
No, the values in the Stock Prediction section are system-generated and cannot be edited manually. They are calculated based on backend logic and real-time data.
While predictions are based on data trends, you can override them in practice by checking actual sales and manually updating your inventory. The Stock Prediction is only an advisory tool, not a restriction.
The system updates the data in real-time or at regular intervals based on the frequency of orders and inventory updates. You will always see the most relevant data for decision-making.
Yes, any product listed in your inventory and currently available for sale will be include
You should plan to restock that product before the projected depletion date to avoid running out of stock. This helps maintain order flow and customer satisfaction.
Yes, you can use the search bar to find specific products and check their individual prediction data for quick access.
It reduces manual guesswork, avoids overstocking or understocking, minimizes lost sales due to unavailability, and ensures that your inventory is aligned with demand.