
Quicksuite Knowledge Base Get Support 24/7
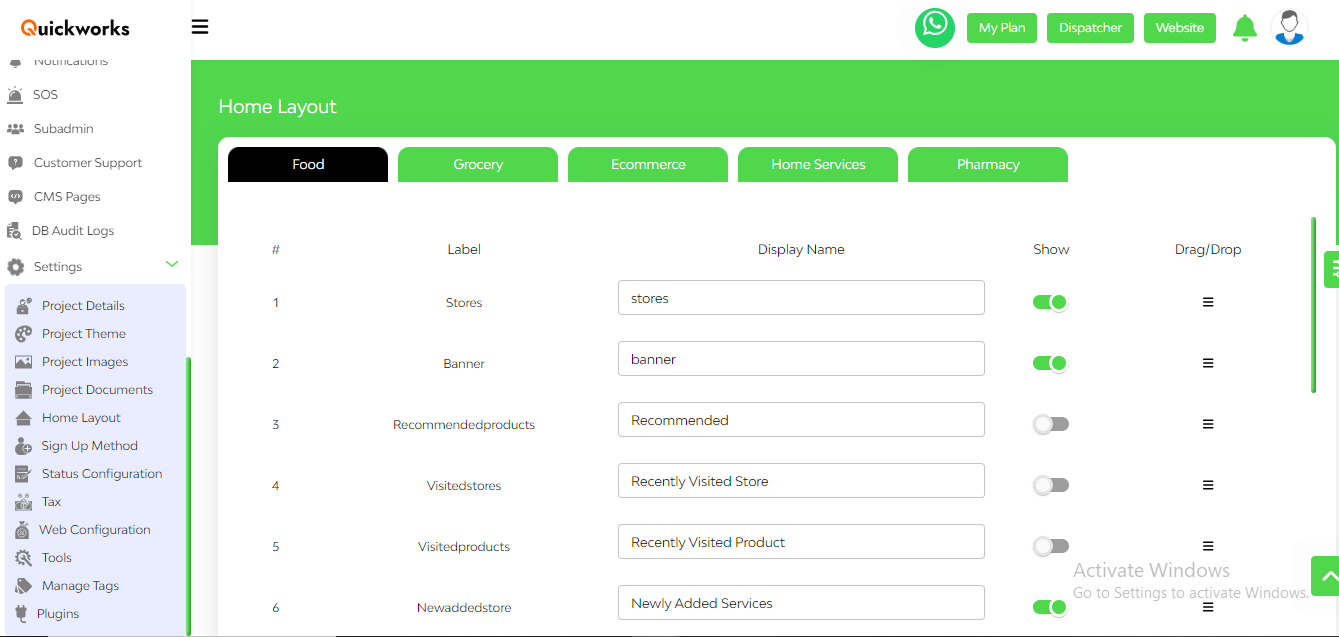
Settings
Customize Your Experience with Quicksuite’s Settings Feature that empowers businesses to customize and configure their platform to suit their unique needs and preferences. From account settings to customization options, Quicksuite puts you in control, allowing you to tailor the platform to align with your business requirements and optimize your workflow.
- Tailored Experience: Customize Quicksuite to match your unique business requirements and preferences, ensuring a personalized and seamless user experience for you and your team.
- Efficiency and Productivity: Streamline workflows and optimize processes by configuring settings to align with your specific workflow requirements. Reduce manual effort, minimize errors, and maximize efficiency across your organization.
- Brand Consistency: Maintain brand consistency and strengthen brand identity by customizing the platform’s appearance and messaging to reflect your brand personality and values.
Let’s learn about every feature in detail:
Project details:
Under this section, the admin can modify the general settings of the project. This encompasses customizing the project, managing keys and URLs, editing profiles, and changing passwords.
General Settings include:
App Name
Company Name
Admin Url
Merchant Url
Dispatcher Name
Dispatcher Url
Support Email
Address
Phone Number
Name: This will be based on the name you provided during the signup. You can change your first name from here.
Phone number: This is the admin phone number based on the number provided during signup. You can change your phone number from here.
and the same with Email ID, Company Name, and Address.
Project Themes: This subsection focuses on the project color theme. Here, the admin can effectively manage the color settings for both end customers and panels.
Project Images: In this section, the admin can efficiently oversee the project’s images like the Admin Logo, Small Admin Logo, Merchant Login Banner, and Admin Login Banner.
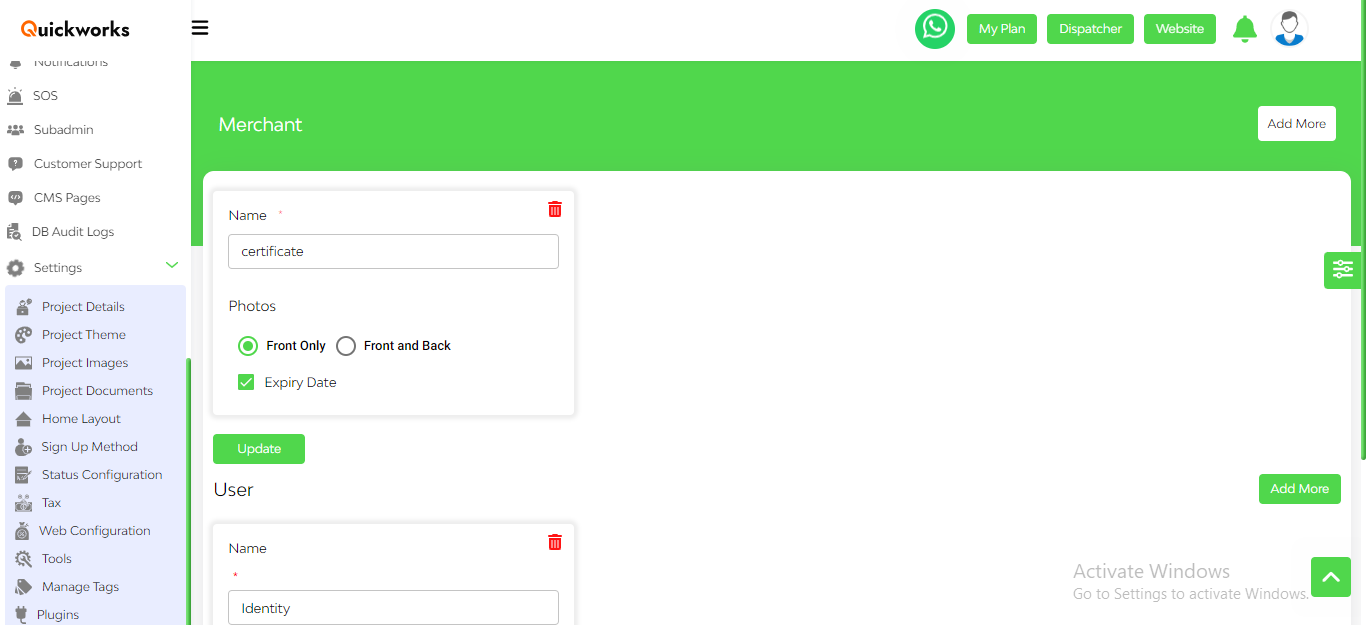
Project Documents: This subsection involves the admin adding necessary documents from both the Dispatcher and User end required during the platform onboarding process.
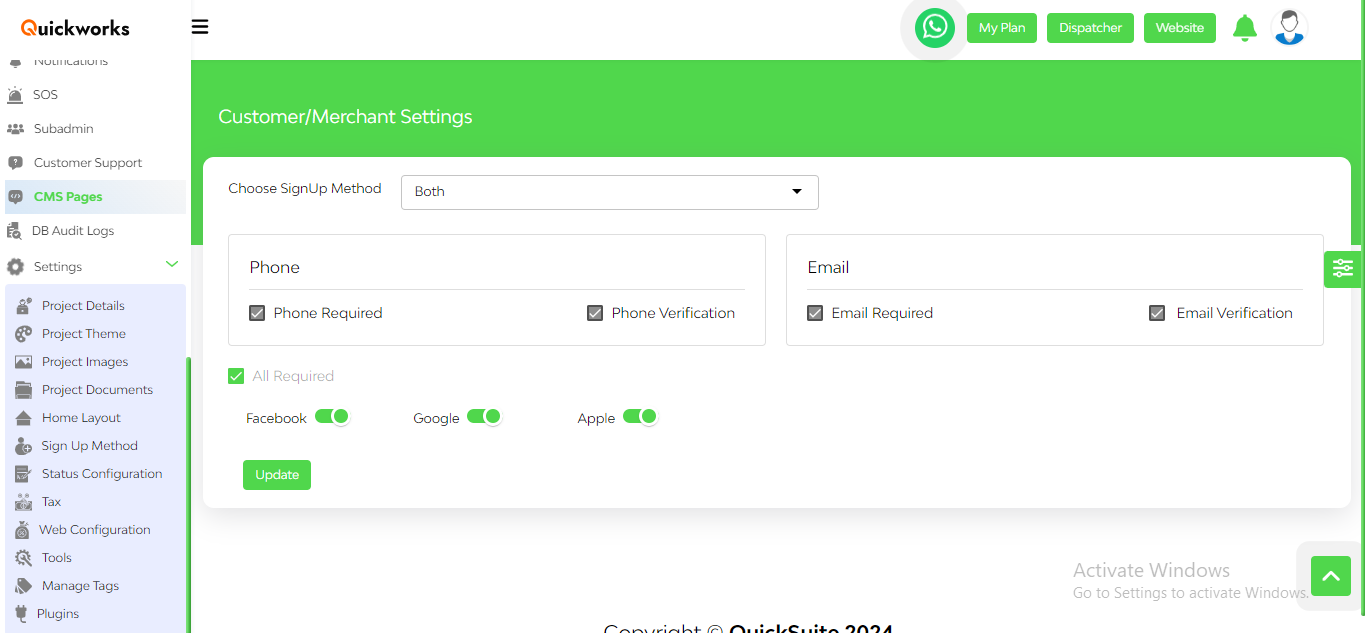
Signup Method: In this subsection, the admin can manage customer signup methods. They can choose between Email, Phone number, or both. Additionally, the admin can set requirements, such as whether phone number verification or Email verification is mandatory. The admin can also enable signup through other media platforms like Facebook, Google, and Apple ID.
Status Configuration: The admin may configure order status in this paragraph. The language, labels, and names can all be changed in addition to adding cancellation fees and time restrictions.
Taxes: This subsection empowers the admin to create taxes like SGST and CGST tailored to business needs. To add a tax, the admin provides essential information like the tax name and tax value. This will help merchants to target the customers in a specific location and they can also set up the charges and taxes accordingly.
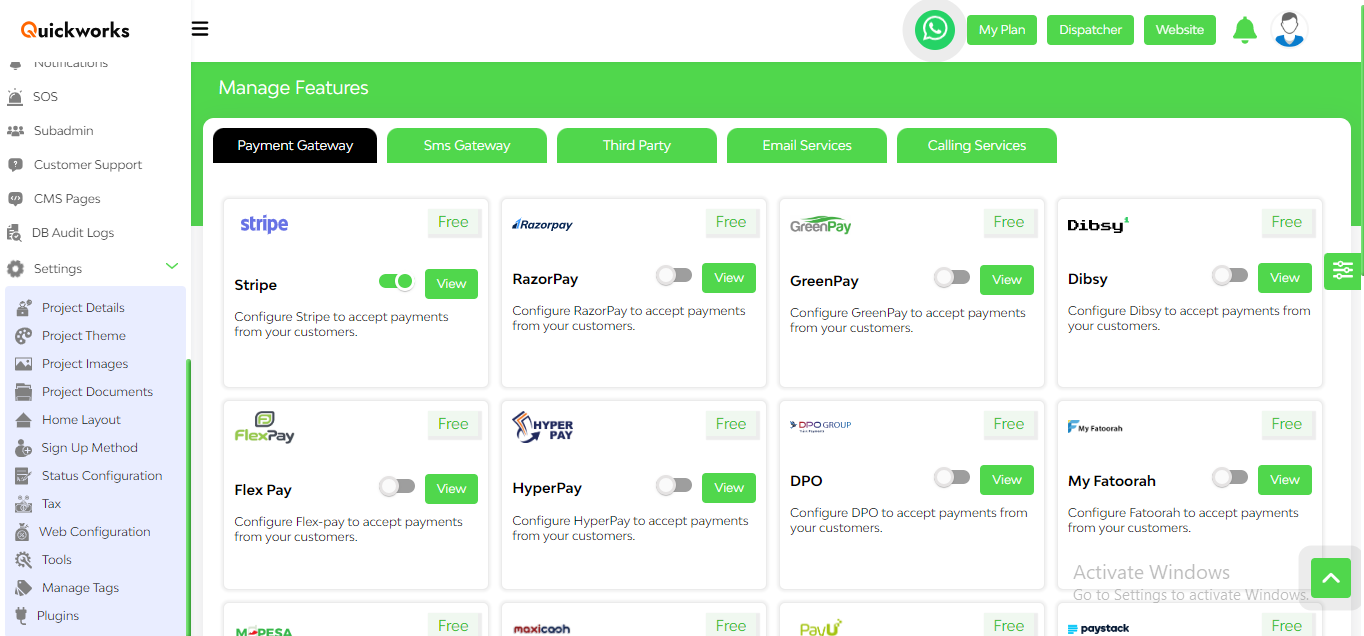
Plugins: Integrating payment gateways into your marketplace is easier. Third party integrations are the APIs available for you to automate your fulfillment process, provide customers with a better experience, and provide you a competitive edge over your competitors. Here we offer payment gateways like Stripe, RazorPay, GreenPay, and more. Get SMS gateways like Twilo, Sinch, SMS Global, SMS Bazar, and more. You can also explore other Third Party Integrations, Email Services, and Calling Services.
Tools: In the tools section, the admin has the capability to perform bulk orders. The admin needs to upload a bulk order image and he can manage module settings effectively.
Get Started with Quicksuite’s Settings Today!
Empower your team, enhance efficiency, and reinforce your brand identity with customizable settings designed to meet your unique needs. Get started today and transform the way you work with Quicksuite.