
QuickGrocery Get Support 24/7
Merchants
The Merchants section is designed to manage every store listed on your platform: from big supermarkets to local mom-and-pop shops.
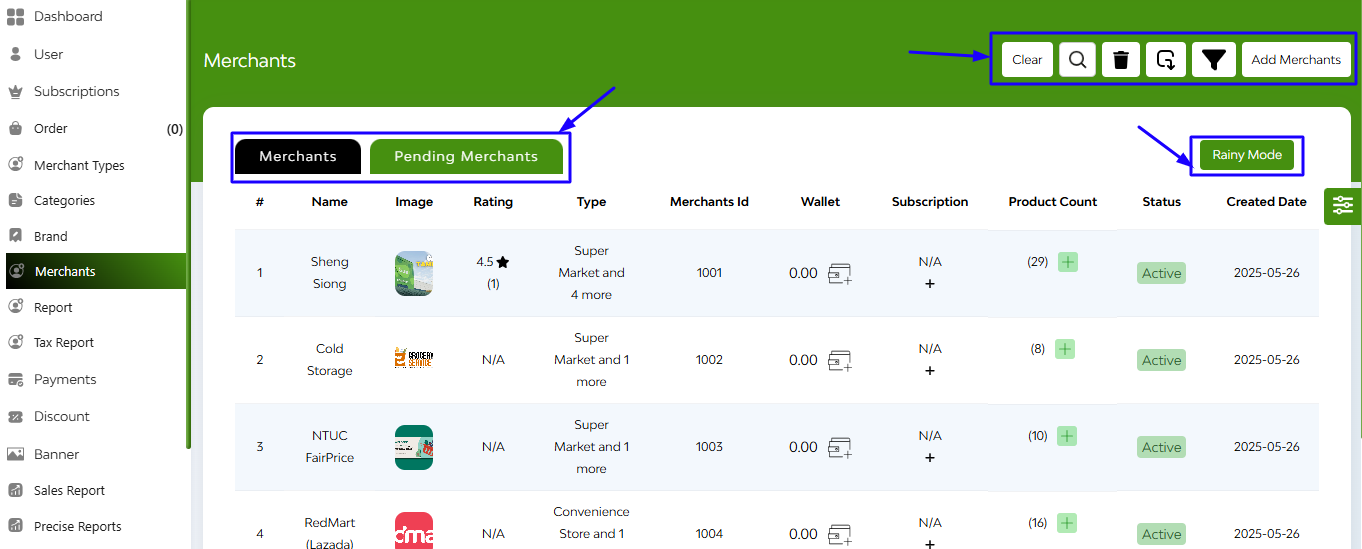
At the top of the interface, you can easily toggle between:
- Merchants Tab: Shows all approved/active merchants.
- Pending Merchants Tab: Displays merchants awaiting approval.
You’ll also find quick-access tools on the top right:
- Search Bar
- Delete – Remove selected restaurant or all.
- Export
- Filter Dropdown – Filter merchants based on reviews, max.and min delivery time, item quality, inactive status.
- Add Merchants – Open a full-screen form to register a new merchant.
Bonus Feature: Rainy Mode
A unique toggle labeled Rainy Mode appears on the interface, through which you can select merchants that you want to show they are unable to deliver because of rain.
At this merchant section interface each row give the clear overview on the basis of:
- Name & Image – Brand identity.
- Rating – User feedback, including average score and number of reviews.
- Type – Cuisine styles offered.
- Restaurant ID – Unique system-generated identifier.
- Wallet – Displays current balance (with a wallet management icon).
- Subscription – Indicates if the restaurant has a subscription (e.g., N/A or Testing).
- Product Count – Number of active items listed (with quick add option).
- Status – Easily toggle between Active or other states.
- Created Date – Onboarding date.
- Action Menu (⋮) – For editing, deleting, or accessing more details.
In the ‘Product Count’ part, there is an option to add a product. While tapping on the + button this action takes you to a new screen with three organized tabs:
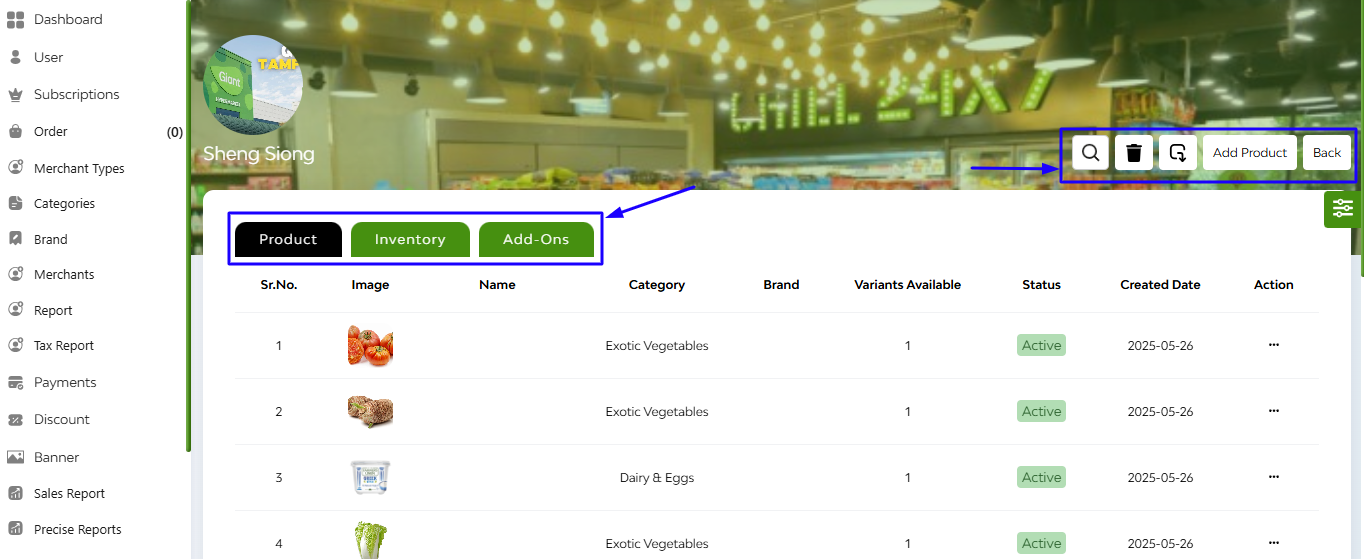
- Product
- Inventory
- Add-Ons
A product listing table displaying image, name, category, brand, variants available, status(active/inactive), created date and action button.
Add new products by clicking the “Add Product” button in the top-right.
Toggle between tabs to manage various facets of your offerings.
+Step Into: Adding a Product
Clicking “Add Product” launches a form-driven product setup experience. This is where your menu items are born.

Detailed Fields Include:
- Product Name (required)
- Admin Commission – set your margins
- Commission Type and Product Merchant Type (both required) – tailor your fees and category
- Product Category (required) – select from available categories (though currently shows “No categories available”)
- Product Subcategory – optional but helpful for filtering
- Quantity Switch – controls if users can add/remove quantity (via a “+/-” toggle)
- Rich Description Editor – write a flavorful description using formatting tools
- Add-Ons Dropdown – attach relevant upsells like extra sauces or cheese
- Market Price & Selling Price Fields
- Upload Image
Then hit the ‘Add New Variant’ tab
Inventory Tab:
Click over to the “Inventory” tab to manage the behind-the-scenes logistics.
 Each card includes:
- Product Image & Name
- Variant info
- Market Price and Price
- Max Purchase Quantity
- Current Quantity
- Stock Toggle: Mark items as “Out Of Stock” or re-enable them with one click.
Real-Time Stock Control:
- Update prices and quantities instantly
- Visual flags for stock availability help you prioritize restocking
Add-Ons Tab
The “Add-Ons” section to manage upsell opportunities like toppings, sides, or customizations.
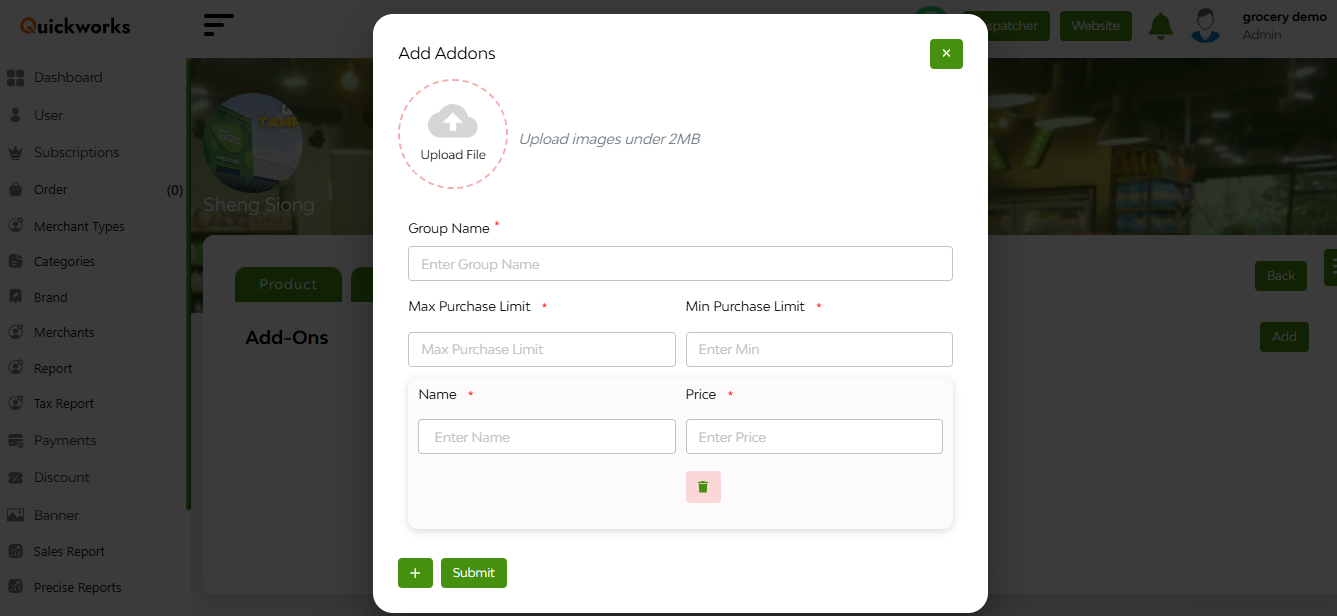
- Create and assign add-ons to products
- Define prices per add-on
- Organize them into categories (e.g., Sauces, Drinks)
This tab is where your menu becomes dynamic, interactive, and high-converting.
+Adding a New Merchant
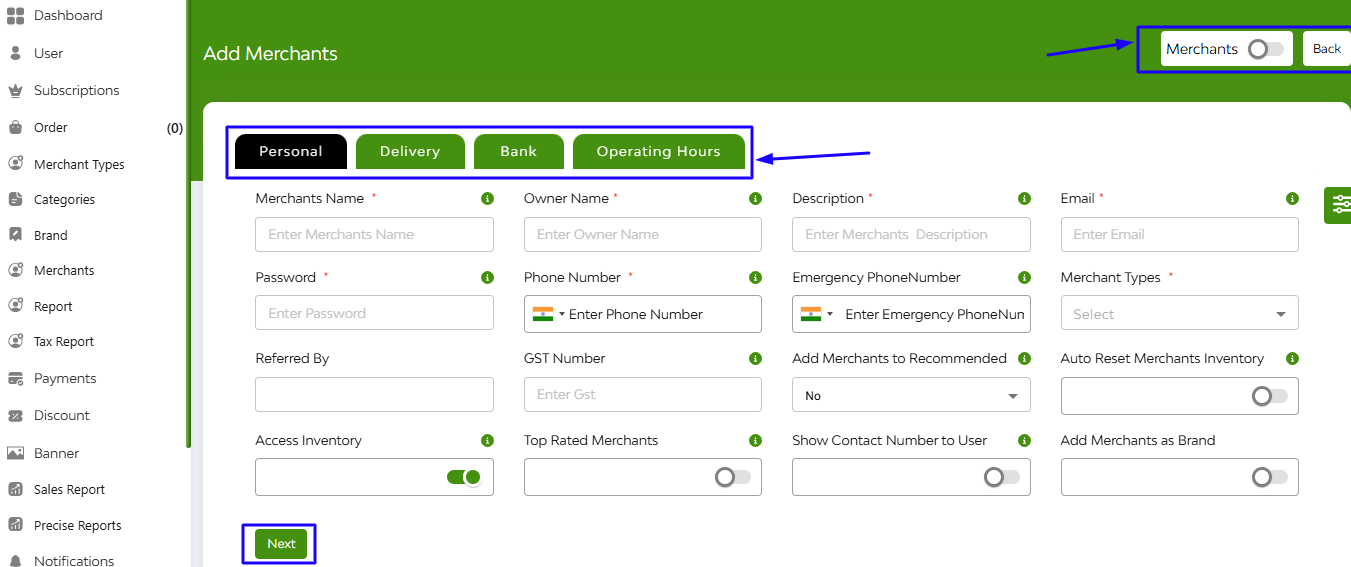
When you click Add Merchants, a multi-tabbed form opens, allowing you to capture comprehensive merchant information. This form is split into intuitive tabs:
1. Personal
- Fields: Merchant name, owner name, description, email, phone, merchant type, serving size, etc.
- Toggles for: Recommended listing, inventory access, contact visibility, brand tagging, and top-rated status.
- Date Range Picker: For promotional listing or active periods.
2. Delivery
- Enter Details like delivery time, average order price, minimum order amount, admin commission type, auto order accepted or not, enable bulk order, schedule booking type, packing charges, service tax, and recurring.
- Upload cover image, profile image
- Enter address, latitude, longitude, Delivery Area Option (for choosing how the delivery area is defined for customers ordersl like fixed delivery area or geofencing)
3. Bank
- Add banking details for payments and commission processing.
4. Operating Hours
- Set the working hours, off-days, and special hours.