Chat with us, powered by LiveChat

Quickrides Knowledge Base Get Support 24/7

Dashboard

The QuickRides Admin Dashboard provides a centralized interface for administrators to monitor and manage taxi operations efficiently.

Upon successful login, the admin is presented with this dynamic admin dashboard.
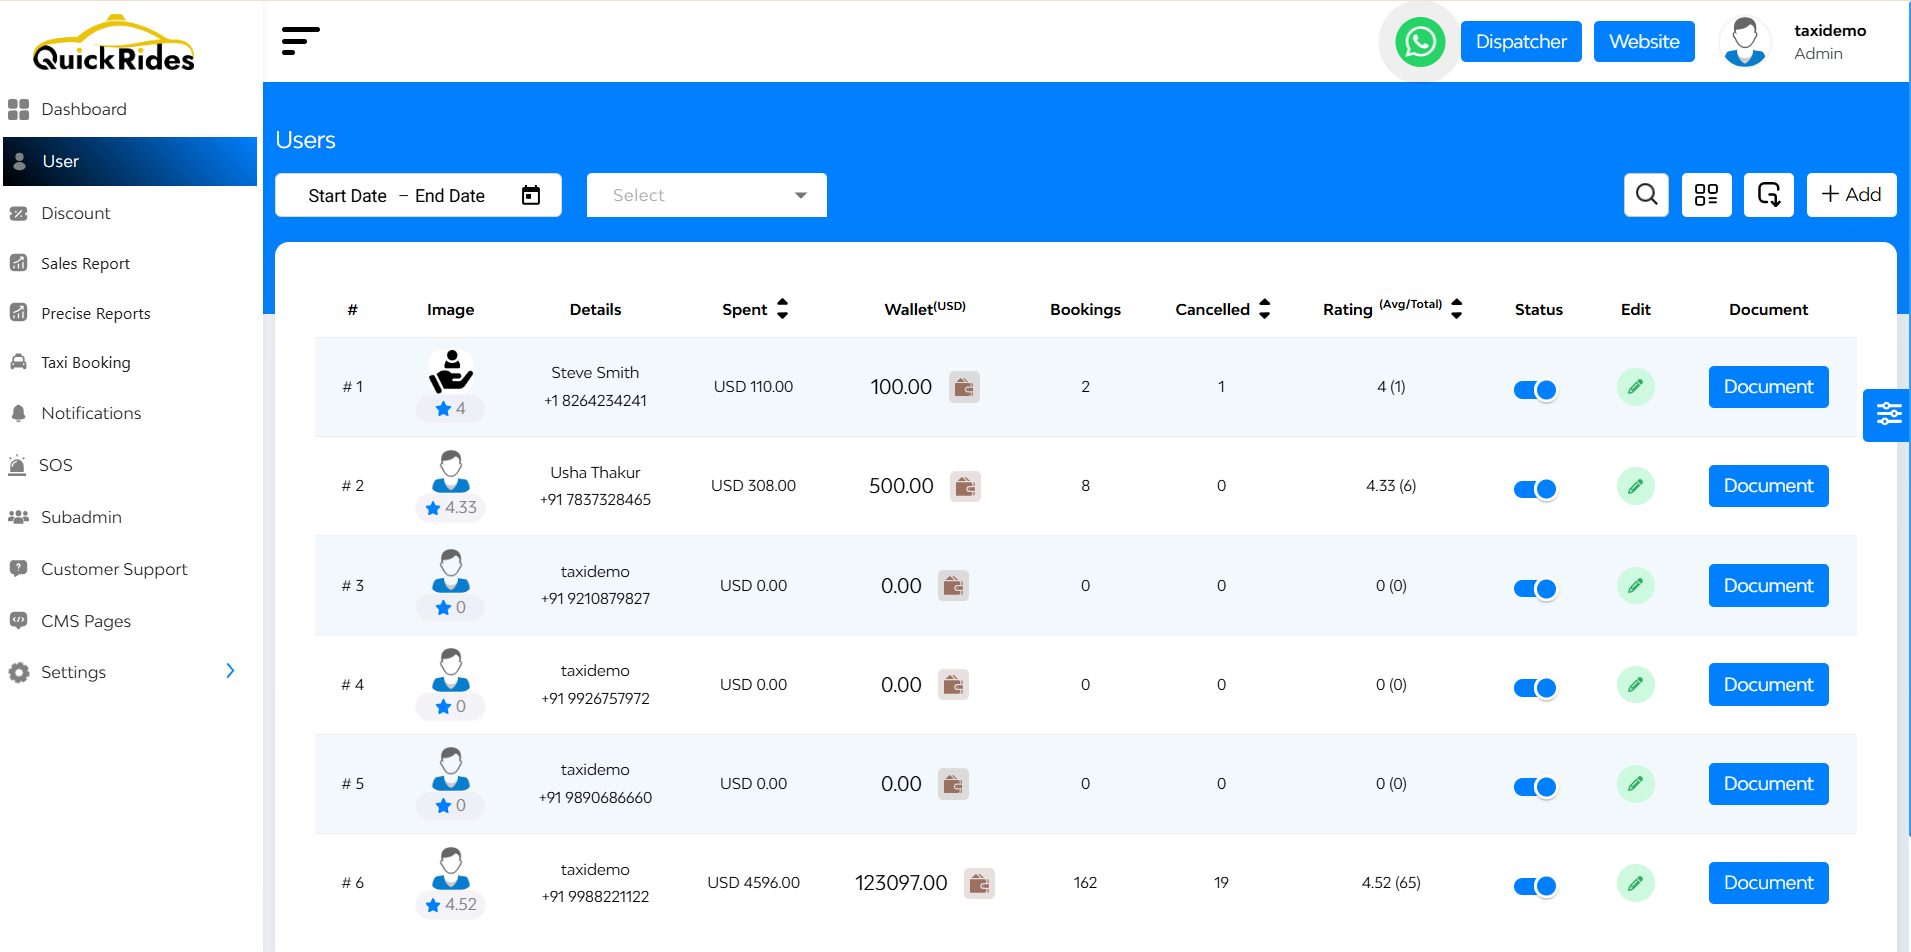
On the left side of the dashboard, there is a Navigation Sidebar that provides easy access to various features and modules within the QuickRides platform.
On the right side of the dashboard, there is a Theme Customization Widget where you can toggle between light and dark modes and customize the color scheme of the sidebar and top bar.

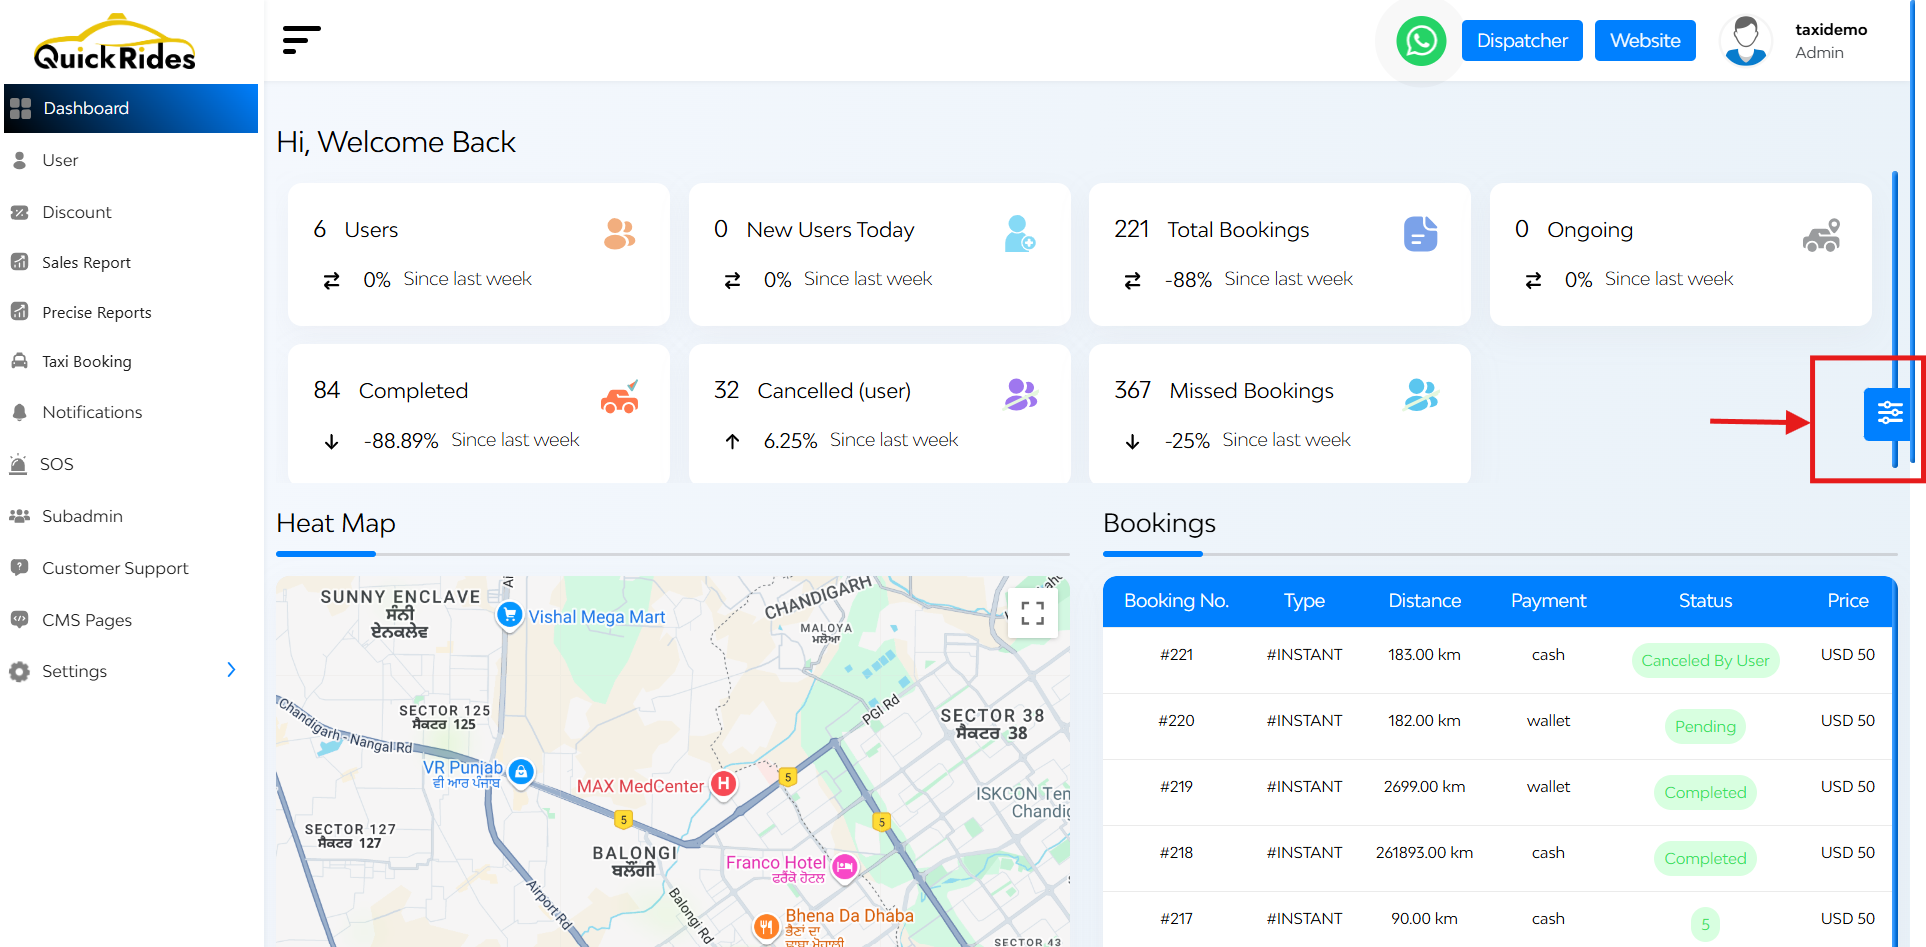
At the centre of the dashboard has Interactive Feature Cards that display

  • Total users
  • New customers today
  • Total bookings
  • Booking status: pending, ongoing, completed, cancelled

Clicking on a card navigated to detailed information about that metric

Also there is a Heat Map Section i.e. a visual representation of booking hotspots.

  • Highlights areas with high user activity
  • Indicates regions with the majority of bookings each month.
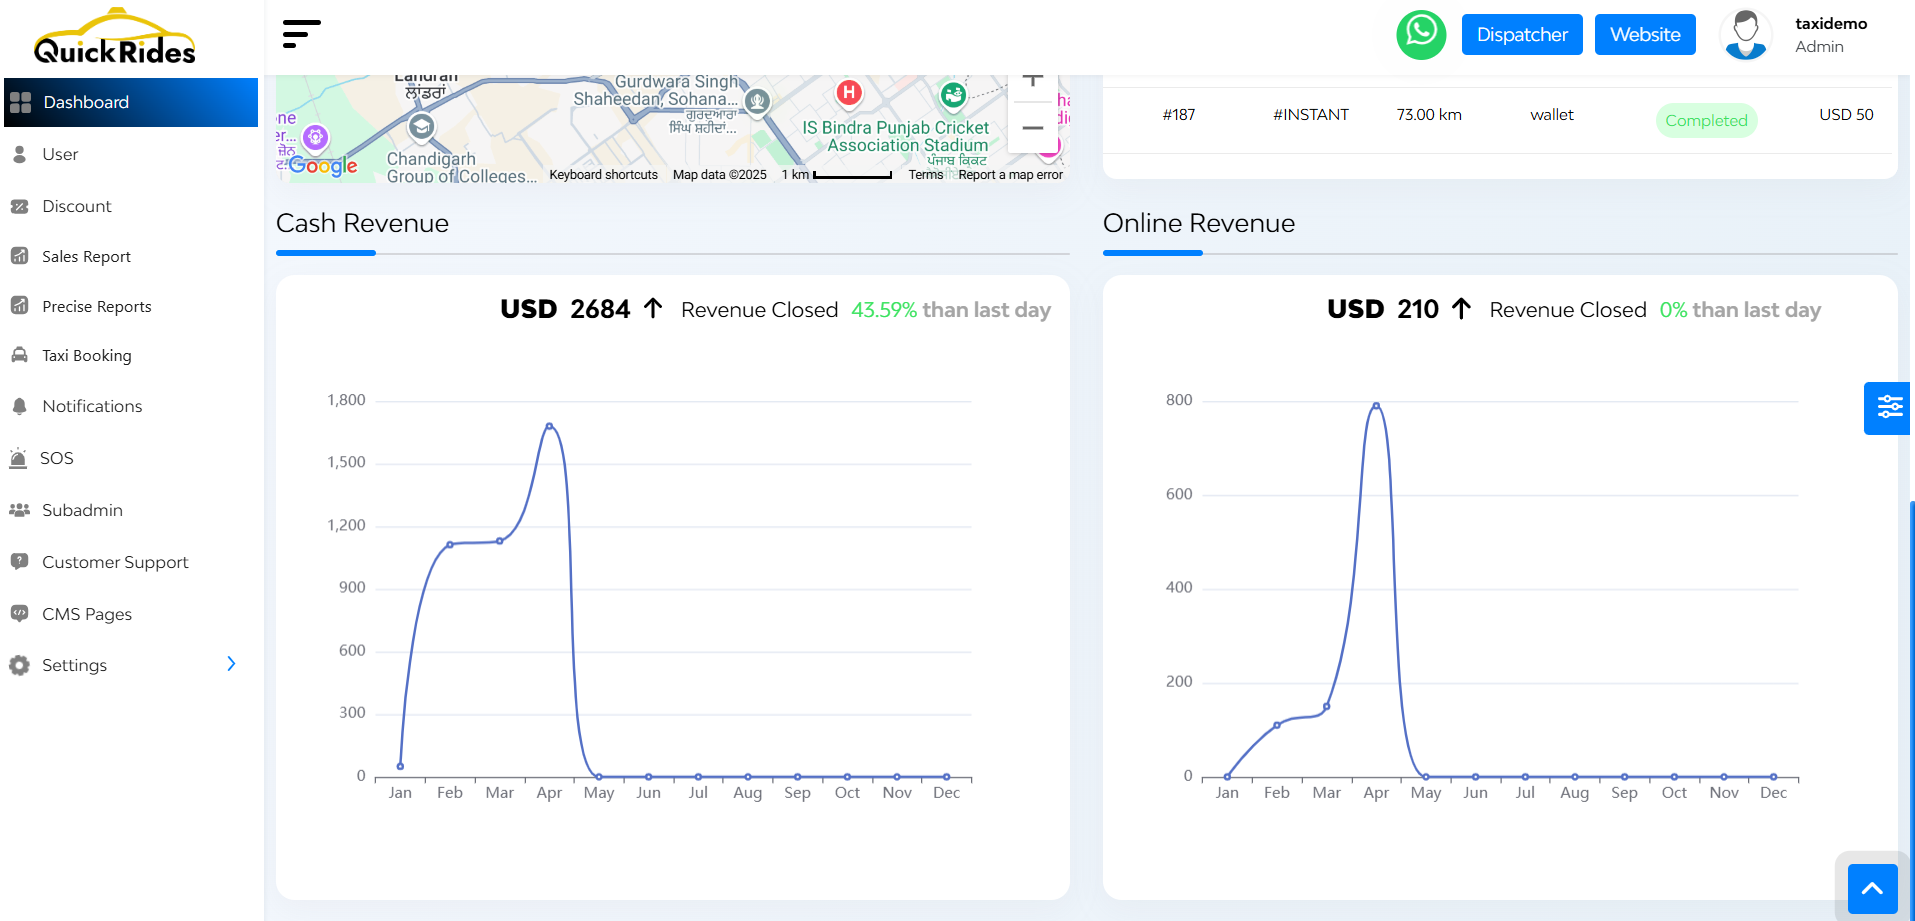
Revenue Graph

  • Cash and online revenue trends over days and hours within a month
  • Total income comparisons between the current and previous months

FAQ's

The cards at the top of the dashboard give a quick summary of key metrics:

  • Total Users: All users onboarded on the platform.
  • New Users Today: Users who signed up today.
  • Total Bookings: All bookings made till date.

Clicking on any card redirects you to the detailed list or records for deeper insights.

The Heat Map shows areas with high booking activity. This allows admins to identify demand hotspots and allocate drivers more efficiently to serve those regions.

Go to the Recent Bookings section on the dashboard or click the Total Bookings card. Each booking displays:

  • Booking type (Instant/Scheduled)
  • Distance covered
  • Payment mode
  • Revenue earned
  • Booking status

In the Users Section, each row shows the wallet balance. Admins can:

  • Credit funds to the user
  • Debit funds from the user
  • All wallet actions are logged and labeled as “Admin transactions.”

Yes. Each user profile has a Block button. Once blocked, the user cannot access services unless unblocked by an admin.

Click the Edit icon next to a user’s name. You can modify fields like:

  • First Name / Last Name
  • Email ID
  • Phone Number
  • Password

Yes. If document verification is enabled, you can:

  • View uploaded documents
  • Replace or edit them
  • Upload front and back of ID documents directly through the panel

Absolutely. Use the date range filters to find users who joined within a specific timeframe. You can also apply quick filters like:

  • Yesterday
  • Last 7 Days
  • Last 30 Days

First, export the sample sheet to understand the required format. Fill in user data in the same layout and upload the file to import users.

Yes. Use the Export Users option to download a spreadsheet of all user data for reporting or backup purposes.

  • List View: Displays users in rows with detailed columns.
  • Card View: Displays each user in a card format for quick overview and actions.

Click on Add User and fill in required fields like:

  • Name, Email, Phone
  • Emergency contact
  • Option to enable/disable cash payment for that user

Then, click Submit to create the user.

Yes. The dashboard shows both Cash Revenue and Online Revenue. For more detailed breakdowns, you can access the Sales Report section.

In the User Profile, you can see the average rating and the number of drivers who contributed to it, giving you insights into both user and driver performance.

Clicking any of these cards takes you directly to the detailed list of relevant users or bookings—making it easy to access actionable insights quickly.

Let me know if you’d like these FAQs formatted as:

  • A PDF Help Guide
  • An in-app Help Center
  • A Zendesk / Intercom knowledge base forma

View Demo

How to Access the Dashboard

How to Access the Dashboard